
You’re in the middle of a baking project and reach for your trusty analog scale—only to pause: where exactly is 350g? Unlike digital displays, analog scales require interpretation. The pointer swings across a dial filled with lines and numbers, but without knowing how to read it, even simple measurements become confusing. Learning how to read an analog scale accurately is essential for cooking, science labs, or any task requiring precise weight measurement.
This guide breaks down the dial layout, step-by-step reading techniques, and pro tips to help you confidently measure in grams and kilograms. Whether you’re measuring flour, sugar, or small ingredients for a recipe, understanding the markings, zeroing the scale, and estimating between lines ensures consistent results every time.
Position the Scale Properly
Before taking any measurement, correct placement is critical to ensure accuracy. The mechanical nature of analog scales means they respond to their environment, so setting them up right from the start prevents many common reading errors.
Use a Flat, Stable Surface
Always place the analog scale on a level, non-slip surface. An uneven countertop or wobbly table can cause the pointer to drift, leading to incorrect readings. Avoid soft surfaces like carpets or towels, which absorb weight and reduce sensitivity. A kitchen counter or sturdy table works best.
Avoid Vibrations and Drafts
Keep the scale away from appliances that vibrate like refrigerators or open windows with air currents. Even slight movement can affect the mechanical balance of the scale and make the pointer unstable. Drafts from fans or air conditioning units can also cause the pointer to flutter unexpectedly.
Pro Tip: Tap the scale gently after placing it down. If the pointer wobbles excessively or does not settle, reposition it on a firmer surface.
Zero the Scale Before Use
Calibrating the scale to zero ensures your measurement reflects only the item being weighed. This step is often skipped but is fundamental to getting accurate results every time you use the scale.
Remove All Items First
Start with an empty scale. Take off any bowls, trays, or residue from previous use. The pointer should rest at the zero mark when nothing is on the platform. If it does not, you will need to adjust it manually using the regulator dial.
Adjust the Regulator Dial
Locate the regulator dial, usually found beneath or behind the scale face. Turn it slowly until the pointer aligns exactly with zero. This manually resets the scale’s baseline.
Warning: Never add material before zeroing. An uncalibrated scale gives false readings from the start, and you will end up with inaccurate measurements.
Tare With a Container
If using a bowl or tray, follow these steps:
1. Place the empty container on the scale.
2. Turn the regulator dial until the pointer returns to zero.
3. Now the scale ignores the container’s weight, and only the contents will register.
This process is called taring, and it is essential for accurate net weight measurement.
Identify Dial Markings Correctly
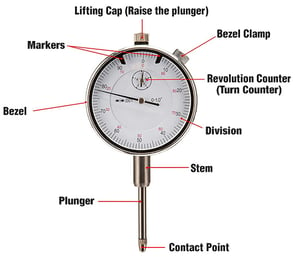
Understanding what each line means is the key to reading an analog scale. The dial uses a hybrid system where numbers represent kilograms while the subdivisions between them represent grams.
Long Lines Represent 100g Increments
The longer marks on the dial represent 100-gram intervals. The first long line equals 100g, the second equals 200g, the third equals 300g, and so on up to 1,000g (1kg), then 2kg, 3kg, and beyond. These are your anchor points and serve as starting references when reading weight.
Short Lines Represent 50g Increments
Each short line marks 50g. They appear between every two long lines, indicating halfway values. Between 100g and 200g, the short line represents 150g. Between 200g and 300g, it represents 250g. Even if no number is printed, you can count these lines to find exact weights.
Numbers Show Kilograms
The large numbers around the dial indicate kilograms (kg). The number 1 equals 1kg (1,000g), the number 2 equals 2kg (2,000g), and so on. But remember: the divisions between them are in grams, not kilograms.
Key Insight: The scale uses a hybrid system where numbers are in kilograms but subdivisions are in grams. So 2.5kg means 2,500g.
Read Measurements Step by Step
Now that the scale is set and you understand the markings, it is time to take a reading. Following a systematic approach prevents errors and helps you achieve precise measurements consistently.
Add Material Slowly
Pour ingredients gradually into the container. Watch the red pointer move across the dial. Add slowly as you near your target weight like 450g. Stopping too late means overshooting, which is common when pouring quickly.
Find the Nearest Long Line
Identify the last long line the pointer has passed. That is your base in 100s. If the pointer is past the second long line, you have at least 200g. Past the fourth means at least 400g. This gives you a solid starting point for your reading.
Check for Short Line Addition
See if the pointer has reached or passed a short line after the last long one. Between 400g and 500g, a short line equals 450g. Just past 600g with no short line means approximately 620g. Midway to the next short line means add approximately 25g. Use this to fine-tune your reading.
Example: Measuring 350g of Sugar
1. Zero the scale with your bowl.
2. Begin adding sugar slowly.
3. Pointer moves past 300g (third long line).
4. Then hits the short line just after: 350g.
5. Stop pouring. You have reached the target.
Quick Check: 300g plus 50g equals 350g. Done.
Estimate Between Lines Accurately

Sometimes the pointer stops between two marks. Here is how to estimate correctly without a digital readout to rely on.
Judge Proximity Visually
If the pointer is closer to 400g than 450g, the reading is approximately 420g. If it is exactly halfway, the reading is approximately 425g. If it is closer to 450g, the reading is approximately 440g. Trust your eye, but practice improves accuracy over time.
Divide the Gap Mentally
Imagine splitting the space between 400g and 450g into five equal parts. Each part equals 10g. One part past 400g equals 410g. Three parts equals 430g. This method helps achieve plus or minus 10 to 25g precision even without digital output.
Pro Tip: Use consistent lighting when reading the dial. Shadows or glare can distort perception and lead to misreading.
Handle Weights Above 1 Kilogram

For heavier items like meat, produce, or large batches, you will go beyond 1kg. Reading higher weights requires combining the kilogram and gram readings.
Read kg First, Then g
Break the reading into two parts. First, identify the whole kilograms from the big numbers. Second, count the extra grams from the subdivisions.
Example: Reading 2.75kg
1. Pointer past the 2: 2kg (2,000g)
2. Then past the 700g mark (seventh long line after 2kg)
3. And the short line: plus 50g
4. Total: 2,000 plus 700 plus 50 equals 2,750g or 2.75kg
You can also say this as 2kg and 750g.
Use Arithmetic for Clarity
Convert mixed units mentally to make reading easier. 3.25kg equals 3,000g plus 250g. 1.9kg equals 1,000g plus 900g. Counting from the nearest kilogram makes large weights easier to manage.
Master Common Readings Fast
Memorize frequent targets to speed up measurement and reduce the need for mental calculation during cooking or baking.
Quick Reference Table
Target Weight: How to Locate
150g: Short line between 100g and 200g
250g: Short line after 200g
350g: Short line after 300g
450g: Short line after 400g
500g: Midpoint (half kg), fifth long line from zero
750g: Short line after 700g
950g: Short line before 1,000g
Memory Aid: Every short line equals plus 50g from the preceding 100g mark.
Avoid Common Reading Errors
Even experienced users make mistakes. Knowing what to watch for helps you avoid inaccurate measurements that could ruin your recipes or experiments.
Forgetting to Tare
One of the most frequent errors is placing a bowl on the scale and adding ingredients without zeroing first. Result: you are measuring bowl plus content, not just the ingredient. Fix: always re-zero with the container in place before adding your ingredient.
Misreading Short vs Long Lines
Confusing a short line (50g) with a long one (100g) leads to 50g errors, which is critical in baking where precision matters. Fix: long lines are longer and more prominent. Use them as your primary guides when counting.
Ignoring Pointer Drift
If the pointer slowly moves after stabilizing, the scale may be unlevel or worn. Fix: recheck surface stability and recalibrate with the regulator dial.
Maintain Accuracy Over Time
Analog scales can lose calibration due to age, shock, or environment. Regular maintenance ensures your scale remains reliable for years of use.
Recalibrate Regularly
Test your scale monthly using a known weight. A standard 500g calibration weight works, or use a verified household item like a labeled bag of sugar. Steps:
1. Place the object on the scale.
2. Check if the pointer aligns with the correct value.
3. If not, use the regulator dial to correct the reading.
Note: Never drop heavy items on the scale. It damages the internal springs and affects accuracy.
Clean Gently
Wipe the platform with a damp cloth. Avoid soaking the base because moisture harms the mechanical parts. Remove spilled flour, oil, or sugar to prevent buildup that affects balance.
When to Replace Your Scale
Despite proper care, analog scales wear out. Watch for these signs that indicate it is time for a replacement.
Persistent Zero Drift
If the pointer refuses to stay at zero even after adjustment, the mechanism is likely damaged. This cannot be fixed with cleaning or recalibration.
Inconsistent Readings
If the same weight gives different results on repeated trials, internal components may be failing. Test by weighing the same item multiple times.
Stiff or Jerky Pointer Movement
Smooth motion is normal. If the pointer jumps or sticks, lubrication is lost or parts are bent. This affects your ability to get accurate readings.
Upgrade Tip: Consider a digital scale for sub-gram precision. But for durability and simplicity, analog still wins in many kitchens.
Frequently Asked Questions About Reading an Analog Scale
What is the difference between short and long lines on an analog scale?
Long lines represent 100g increments, while short lines represent 50g increments. Every short line sits exactly halfway between two long lines, marking values like 150g, 250g, and 350g.
How do I zero an analog scale with a container?
Place your empty container on the scale, then turn the regulator dial (usually at the base or back) until the pointer returns to zero. This tares the scale and excludes the container’s weight from your measurement.
Can I estimate between lines on an analog scale?
Yes. If the pointer falls between two marks, visually estimate its position. For example, halfway between 400g and 450g equals approximately 425g. With practice, you can achieve accuracy within plus or minus 10 to 25g.
How do I read weights above 1 kilogram?
Read the large numbers for kilograms, then add the gram subdivisions. For 2.75kg, find the 2 (2kg), then add 750g from the dial markings. This equals 2,750g total.
Why does my pointer move after I stop adding weight?
This usually indicates an unstable surface or environmental interference. Check that your scale is on a level, vibration-free surface. If the problem persists, your scale may need recalibration or repair.
How often should I calibrate my analog scale?
Calibrate your scale monthly if you use it frequently. For occasional use, check calibration before important measurements. Always verify with a known weight like a 500g calibration mass or a verified household item.
Key Takeaways for Reading an Analog Scale
Reading an analog scale does not require advanced math. It only requires pattern recognition and attention to detail. By understanding the meaning of long and short lines, zeroing properly, and estimating between marks, you can achieve reliable, repeatable results.
The most important points to remember are that long lines equal 100g, short lines equal 50g, and the dial numbers represent kilograms while subdivisions represent grams. Always zero the scale before measuring, use tare when weighing with a container, and practice estimating between lines to improve your precision.
With consistent use, reading an analog scale becomes second nature. It is fast, intuitive, and accurate. Whether you are baking a cake, teaching measurement in class, or working in a lab, these skills ensure precision without relying on batteries or digital screens.



