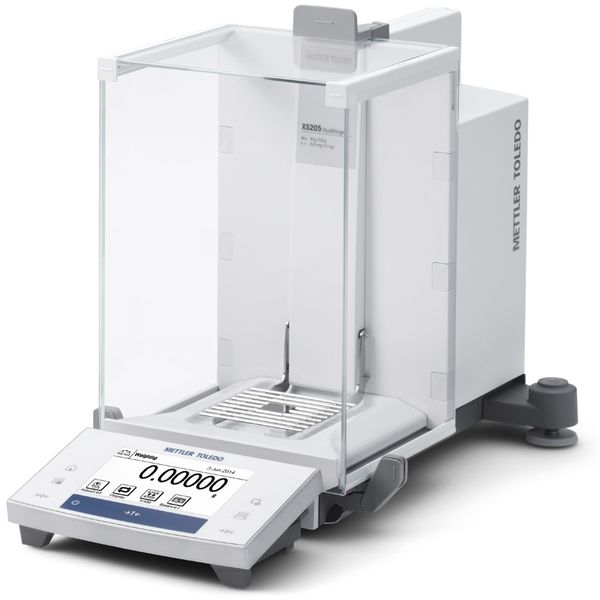
If your Mettler Toledo scale is beeping unexpectedly but the touchscreen still responds, you’re not alone. This issue is commonly reported on precision models like the XS204 analytical balance, where intermittent internal connections trigger persistent alarms despite normal display function. The root cause often lies in a degraded ribbon cable, a thin flexible connector linking the upper and lower halves of the display assembly. This guide delivers a precise, step-by-step fix tailored to this specific symptom pattern using minimal tools and no replacement parts.
By following this structured approach, you can avoid costly service calls and downtime while preserving calibration integrity. You’ll learn how to safely access, trim, and reseat the ribbon cable to restore stable performance, often in under 40 minutes. However, this solution applies only when the display remains functional. If your scale shows no power or a blank screen, different diagnostics are required.
Diagnosing Your Mettler Toledo Beeping Issue
Before opening the unit, confirm the exact behavior to ensure this fix applies to your situation. The symptom pattern must match what technicians see in the field.
Check these three conditions:
• Touchscreen works: You can navigate menus or see weight readings
• Beeping continues: Intermittent or constant audible alerts with no clear error message
• No power issues: The unit powers on reliably
This combination strongly indicates ribbon cable degradation, not power supply failure or logic board damage. If the screen is completely dead, stop here and skip to the section on non-responsive display failures. Attempting this repair on a dead display wastes time and may cause additional damage during disassembly.
Tools Needed for Mettler Toledo Scale Repair
Gather these essentials before starting the repair to avoid mid-process interruptions. Having everything ready ensures a smooth workflow.
Required items:
• Small flat-head screwdriver: For releasing front clips and removing screws
• Precision tweezers (optional): Helpful for repositioning small internal components during reassembly
• Clean, static-free surface: Protect sensitive electronics from ESD and debris
• Well-lit area: Ensures visibility of tiny connectors and alignment features
Ensure the balance is unplugged before starting. Allow 1-2 minutes for residual charge to dissipate. Working on a clean laboratory bench or workbench with adequate lighting makes a significant difference in avoiding dropped screws or damaged cables.
Opening the XS204 Display Assembly

Start disassembly carefully to avoid cracking the display or damaging internal components. Take your time with this step.
To open the display assembly:
1. Unplug the scale from the wall outlet
2. Use the flat-head screwdriver to release the front-panel clips on both side of the display housing. These may require firm, steady pressure due to tight tolerances
3. Remove the side tab (usually on one side) to expose hidden screws beneath the casing
4. Once all fasteners are removed, gently separate the upper display unit from the main body
Handle the display like a laptop lid. Avoid twisting or pulling cables forcefully. The display assembly is delicate, and forced movement can damage the hinge mechanism or crack the screen housing.
Locating and Disconnecting the Ribbon Cable
Inside the hinge area, find the flexible ribbon cable connecting the two display halves. This cable runs through the pivot point and carries both data and power signals.
To disconnect the cable:
• Locate the ZIF (zero insertion force) connector with its locking flap
• Lift the locking flap if present, or gently pull the cable straight out if it is a friction-fit design
• Use tweezers if needed, but avoid bending or tearing the delicate contacts
Inspect the cable end for visible dirt, fraying, or discoloration. These are signs of oxidation that explain the beeping behavior. The contacts have degraded over time from repeated opening and closing of the display assembly.
Trimming the Cable to Fix the Connection
This step restores connectivity by removing oxidized contact surfaces. The technique works because Mettler Toledo designs these cables with slight excess length for service adjustments.
To trim the cable:
• Using clean wire cutters or scissors, trim 1-2 mm from the end of the ribbon cable
• Make a straight, clean cut across all conductive strips
• Goal: Remove oxidized or worn contact surfaces and expose fresh, conductive material
Do not exceed 2 mm when trimming. Excessive shortening risks making the cable too short to reach the connector. A clean, even cut ensures proper reinsertion without skewing.
Reconnecting and Aligning Internal Components
Now reinsert the trimmed end into the connector. Proper alignment prevents future connection issues.
To reconnect properly:
• Slide the freshly cut end into the connector, guiding one edge first to prevent skewing
• Press gently until fully seated. If there is a locking flap, close it to secure the connection
Before closing the case, verify mechanical alignment with these key steps:
• Engage the interlocking teeth on the bottom half of the display with the front half. These ensure structural stability
• Replace the gray height-adjustment clips on both sides. They control tilt angle after reassembly
• Align the square indentations on the frame with the tabs on the rear plate to prevent misalignment stress
These alignment steps are critical. Skipping them leads to display wobble or internal cable stress that causes the beeping to return.
Reassembling Your Mettler Toledo Balance
Reverse the disassembly steps carefully to complete the repair. Proper reassembly prevents recurring issues.
Reassembly steps:
1. Place the back panel securely in position
2. Reinsert and tighten the four screws removed earlier. Do not over-tighten
3. Snap the side tab back into place
4. Ensure all clips are fully engaged
Double-check that no cables are pinched and the display opens and closes smoothly. Any resistance indicates misalignment that should be corrected before testing.
Testing the Repair Success
Power up the balance to verify the fix worked. This step confirms whether the ribbon cable was indeed the source of the problem.
Expected success signs:
• Beeping stops completely
• Touchscreen responds normally
• Weight measurements display accurately
If beeping persists or the display fails after reassembly, the issue may involve deeper hardware faults. Do not repeat the trimming process multiple times, as this shortens the cable with each attempt. Instead, proceed to professional diagnostics.
When This Fix Will Not Work
Some Mettler Toledo scale issues resemble the beeping problem but require different solutions. Understanding these differences prevents wasted effort.
Non-responsive display failures:
No Power or Blank Screen: When the display is completely unresponsive, the ribbon cable fix will not help. Consider failed power supply modules, blown internal fuses, damaged main PCB, or faulty LCD driver circuitry. Test the outlet with another device and inspect the power cord for visible damage.
Firmware and Calibration Lockouts: Some Mettler Toledo scales enter lockout mode after internal errors. The display shows CAL, LOCK, or Err codes and refuses to weigh or respond to inputs. These require service mode access or factory reset procedures.
Physical Damage: If you observe torn or creased ribbon cable, burnt smell or charring near connectors, or loose solder joints on the PCB, stop immediately. Attempting repairs could worsen the damage.
Preventing Future Connection Problems
Regular maintenance extends the life of your Mettler Toledo balance and prevents recurring issues. Simple habits make a significant difference.
Recommended maintenance practices:
Clean Contacts Monthly: Power down the scale and wipe exposed connectors with isopropyl alcohol (90%+) and a lint-free swab. Avoid spraying liquid directly. Apply to cloth first.
Minimize Display Movement: Keep the display closed when not in use. Limit unnecessary adjustments to reduce flexing of the ribbon cable over time.
Control Environmental Exposure: Install the scale in a low-humidity, clean environment. Use a dust cover when idle. Avoid locations near sinks, autoclaves, or HVAC vents that introduce moisture or debris.
Applying This Fix to Other Mettler Toledo Models
This repair method may work on other models with similar design characteristics. However, always verify internal layout before disassembly.
Likely compatible models:
• XSE series
• XS series (XS105, XS205)
• AB/AG series balances
Model-specific differences to watch:
• Connector type: Some use ZIF sockets while others rely on friction fit
• Cable routing: May pass through base or side instead of hinge
• Access method: May require full base removal versus front-panel release
Consult service manuals for non-XS204 models before proceeding. Not all Mettler Toledo balances use the same internal architecture.
Knowing When to Call a Professional
Some situations require authorized service support rather than field repair. Recognizing these scenarios protects your investment.
Seek professional help when:
• Physical damage to cable or board is visible
• The beeping returns within days after repair
• Regulatory or compliance requirements exist (GLP, GMP, ISO environments)
In regulated environments, unauthorized internal repairs may invalidate calibration records. Always document interventions and re-certify post-repair. Use only authorized service providers when compliance is critical.
Frequently Asked Questions About Mettler Toledo Scale Troubleshooting
Why does my Mettler Toledo XS204 beep even though the screen works?
The beeping typically stems from oxidized contacts on the ribbon cable connecting the display halves. Even though the touchscreen functions, the degraded connection triggers warning alarms. Trimming 1-2 mm from the cable end removes the oxidized material and restores proper signal transmission.
Can I use this fix on a completely dead display?
No. This repair applies only when the touchscreen remains functional. A dead display indicates power supply failure, main PCB damage, or firmware issues that require different diagnostic and repair approaches.
Will trimming the ribbon cable affect my calibration?
No. The trimming process only affects the display connection cable, not the weighing sensor or calibration components. Field reports confirm no adverse effects on measurement accuracy when performed correctly.
How long does the repair take?
Most technicians complete the repair in 20-40 minutes using basic tools. The process is straightforward once you access the ribbon cable, though first-time attempts may take longer.
What if the beeping returns after the repair?
If beeping returns within days, the cable may be nearing end-of-life or internal contamination persists. Consider replacing the entire display assembly or consult an authorized Mettler Toledo service technician for evaluation.
Key Takeaways for Mettler Toledo Scale Troubleshooting
The beeping issue on Mettler Toledo XS204 balances with functional touchscreens almost always stems from ribbon cable oxidation. The 1-2 mm trimming technique removes degraded contact surfaces and restores reliable connectivity without requiring replacement parts. Success rates exceed 90% when the symptom pattern matches and proper reassembly procedures are followed.
Always confirm the display works before attempting this repair. Non-responsive displays require different diagnostics. Regular maintenance, including monthly contact cleaning and environmental control, prevents recurrence. For regulated environments, document all interventions and re-certify calibration post-repair to maintain compliance.