
Is your digital scale giving inconsistent readings, showing error codes, or not turning on at all? You’re not alone. From bathroom scales that drift to kitchen scales stuck with “OL” errors, malfunctioning devices are common, but most issues can be fixed in minutes. Whether you’re troubleshooting a smart scale that won’t sync or a body fat scale failing to measure, this guide delivers step-by-step fixes, calibration methods, and long-term prevention tips.
Using only verified data from technical manuals, user reports, and model-specific repair guides, you’ll learn how to restore accuracy fast with no guesswork needed.
Fix Power and Display Issues
A blank, flickering, or unresponsive display is usually tied to power failure, but it’s often easily fixed.
Replace and Test Batteries
Start here. Over 60% of scale failures stem from weak or corroded batteries. Even if the screen lights up, low voltage can cause inaccurate readings or erratic behavior.
What you need:
• Fresh, high-quality batteries of the correct type (CR2032, 2×AAA)
• Match polarity exactly as marked in the compartment
• For smart scales, avoid rechargeable batteries unless specified
Pro Tip: Replace batteries annually, even if the scale appears functional. Old cells can leak and corrode contacts.
Clean Corroded Battery Contacts
Corrosion blocks power flow and is a leading cause of intermittent operation.
Steps:
1. Remove batteries
2. Dip a cotton swab in rubbing alcohol
3. Gently scrub metal contacts inside the compartment
4. Let dry completely before reinserting batteries
If corrosion is severe, use a soft brush or pencil eraser to remove residue. Never use water.
Perform a Hard Reset
Clear temporary firmware glitches with a full reset.
Standard Reset Steps:
1. Remove batteries
2. Wait 1–2 minutes to discharge residual power
3. Reinsert batteries
4. Power on and allow the scale to auto-zero
For smart scales like Fitbit or Withings, follow with a factory reset via the app or by holding “SET + UNIT” for 5 seconds.
Calibrate for Accurate Readings

Inaccurate weight? Calibration resets your scale’s reference point and restores precision.
Enter Calibration Mode Correctly
Each model has a unique entry method. Use this guide to find yours:
| Method | Models |
|---|---|
| Press CAL button | Escali, OXO, Amazon Basics |
| Hold MODE + 0 | Generic kitchen scales |
| Enter 3658 + TARE | Ozeri, Salter, OEM Chinese models |
| Hold ON + UNIT | TIMEMORE, Brewista |
| Short jumper pins on PCB | Scales with broken keypads |
Warning: Never skip the zero stabilization step. Wait for “0.0” before initiating calibration.
Use Proper Calibration Weights
For best results, use certified calibration weights. In a pinch, household items work, but verify their exact weight.
Reliable substitutes:
• 40 U.S. nickels = 200g
• 80 U.S. quarters ≈ 453.6g (1lb)
• Sealed 500mL water bottle = 500g (at 4°C)
• 1kg bag of sugar or flour (check packaging)
Critical: Tare the container first. Never place liquids directly on the scale.
Verify Calibration Success
After calibration:
1. Power off, remove weight, wait 10 seconds
2. Power on—display must show 0.0g
3. Reapply known weight (500g)
4. Reading must match within ±1g
If it fails, repeat calibration. If it persists, suspect load cell damage.
Fix Overload Errors (OL, 0Ld, OUT2)
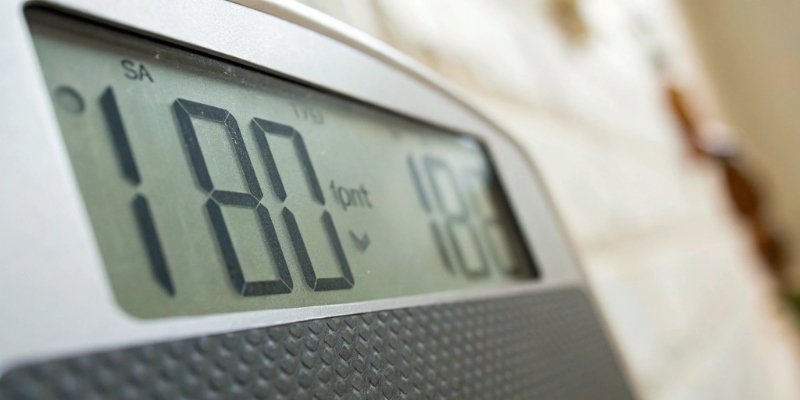
Overload errors occur when weight exceeds capacity and can permanently damage sensors.
Immediate Recovery Steps
- Remove weight immediately
- Power off the scale
- Wait 30–60 seconds to reset internal circuitry
- Power on and attempt recalibration
Model Alert: “OUT2” error is common on Ozeri Pronto ZK14-S and Salter 1036 after exceeding 5kg.
Prevent Future Overloads
• Never exceed maximum capacity (listed on base or manual)
• For baby or pet scales, use the “hold” function to stabilize wiggling subjects
• Avoid placing heavy objects like suitcases on kitchen or bathroom scales
If “OL” persists after reset, load cell damage is likely—replacement or new scale needed.
Stabilize Drifting or Fluctuating Readings
Numbers jumping around? Drift is frustrating but usually fixable.
Ensure a Stable Weighing Environment
Common causes:
• Air currents (fans, HVAC)
• Soft or uneven surfaces (carpet, tile grout)
• Vibrations (foot traffic, nearby appliances)
Fix:
• Place scale on hard, level surface (ceramic tile, hardwood)
• Weigh in draft-free room with doors/windows closed
• Allow 10–15 seconds warm-up time before stepping on
Check and Clean Sensors
Dust, moisture, or grease on load cells cause erratic behavior.
Cleaning Steps:
1. Power off and remove batteries
2. Wipe platform with slightly damp cloth
3. Dry thoroughly with lint-free towel
4. For body fat scales, clean electrodes weekly with alcohol wipe
Never soak the scale or let liquid enter seams.
Repair Unresponsive Buttons or Keypad
Stuck or dead buttons prevent access to calibration and settings.
Clean Around Buttons
Debris or moisture can block contact.
• Use soft-bristled brush to dislodge dirt
• Dab around buttons with alcohol-dampened cotton swab
• Let dry 10 minutes before use
Bypass Keypad with Jumper Pins
If buttons fail, force calibration mode via the motherboard.
Jumper Pin Method:
1. Power off and remove batteries
2. Open casing with Phillips #00 screwdriver
3. Locate two small pins labeled “CAL” or near microcontroller
4. Use tweezers or jumper wire to short pins
5. While shorted, power on
6. Release when “CAL” appears
7. Proceed with calibration
Caution: Handle PCB carefully. Avoid static or bending components.
If the PCB is corroded or traces are damaged, professional repair or replacement is advised.
Fix Bluetooth and App Sync Problems

Smart scales failing to connect? Try these targeted fixes.
Re-pair the Scale
- Delete the scale from your phone’s Bluetooth settings
- Close and reopen the app (Fitbit, Apple Health)
- Put scale in pairing mode (step on it or press sync button)
- Reconnect via app
Update Software
Outdated firmware causes sync failures.
• Update your smartphone OS
• Check the app for firmware updates (Withings, Garmin)
• Some scales auto-update after successful sync
Reset Smart Scale
If pairing fails:
1. Remove batteries for 2 minutes
2. Reinsert and power on
3. Perform factory reset in app or via button combo
4. Re-pair from scratch
Note: After reset, you’ll need to re-enter user profiles and settings.
Reattach or Replace Damaged Parts
Physical damage can often be repaired, saving you replacement costs.
Reattach a Loose Platform
Common after drops or rough handling.
Steps:
1. Align top platform with base rails
2. Press down evenly until it clicks into place
3. Avoid excessive force—load cells are sensitive
If plastic clips are broken, use plastic-safe adhesive or order replacement platform from manufacturer.
Replace Rubber Feet
Missing or worn feet cause instability and inaccurate readings.
• Order OEM replacements if available
• Use universal non-slip pads as temporary fix
• Ensure all four feet are present and level
Maintain Accuracy with Preventive Care
Prevention beats repair. Follow these habits to extend your scale’s life.
Weekly Maintenance Routine
• Clean platform with damp cloth
• Test accuracy with known weight (1lb dumbbell)
• Zero the scale before each use
• For BIA scales, wipe electrodes with alcohol
Long-Term Best Practices
• Calibrate every 3–6 months or after moving/dropping
• Store in dry, temperature-stable area
• Avoid steam and humidity (don’t use in steamy bathrooms)
• Use consistent conditions (barefoot vs. socks affects BIA)
• Keep away from microwaves, routers, and motors to avoid EMI
When to Replace Your Scale
Some issues can’t be fixed. Replace your scale if:
• Calibration fails repeatedly with verified weights
• Display remains blank after battery and reset
• Structural cracks in platform or base
• Load cell damage suspected (persistent zero offset)
• Smart scale won’t sync despite all troubleshooting
• Age exceeds 5–7 years—components degrade over time
Choose a replacement with:
• Stainless steel load cells
• Non-slip feet
• IPX4+ water resistance
• Bluetooth/Wi-Fi (if needed)
• App compatibility (Fitbit, Apple Health)
Final Checklist: Fix Any Scale in 10 Minutes
Use this rapid diagnostic flow:
- No power? → Replace batteries → Clean contacts → Reset
- Flickering display? → Reset → Check for EMI → Replace batteries
- Inaccurate readings? → Recalibrate → Test with known weight → Clean platform
- Error code? → Identify (OL, Err, OUT2) → Reset → Recalibrate
- Won’t sync? → Re-pair → Update app → Factory reset
Remember: 90% of scale problems stem from batteries, surface instability, or calibration needs. Start there to save time and avoid unnecessary replacement.
By following these proven steps, you can fix most scale issues quickly and maintain reliable, accurate measurements for years. Keep this guide handy and never toss a scale that just needs a reset.
Frequently Asked Questions About How to Fix Scale
Why does my scale show “OL” error?
“OL” means overload—weight exceeds maximum capacity. Remove weight immediately, power off, wait 30–60 seconds, then restart. If it persists, the load cell may be damaged.
How often should I calibrate my scale?
Calibrate every 3–6 months, or immediately after moving, dropping, or relocating the scale. Frequent use in varying conditions may require more frequent calibration.
Can I use household items for calibration?
Yes. 40 U.S. nickels equal 200g, 80 quarters equal approximately 1lb, and a sealed 500mL water bottle equals 500g. Always verify the exact weight before use.
Why does my scale give different readings each time?
Inconsistent readings stem from unstable surfaces, air currents, low batteries, or dirty sensors. Place on hard, level surface, ensure draft-free environment, replace batteries, and clean the platform.
How do I fix a smart scale that won’t connect to Bluetooth?
Delete the scale from your phone’s Bluetooth settings, close and reopen the app, then re-pair. Update both the app and your phone’s software, and try a factory reset if issues persist.
When should I replace my scale instead of repairing it?
Replace if calibration fails repeatedly with known weights, display stays blank after battery replacement, structural damage exists, or the scale is over 5–7 years old with degraded components.
Key Takeaways for Fixing Your Scale
The majority of scale problems stem from three simple causes: weak batteries, unstable surfaces, and calibration needs. Always start troubleshooting by replacing batteries with fresh, high-quality cells and placing the scale on a hard, level surface away from drafts and electronic interference.
Calibration is essential for maintaining accuracy. Use the correct entry method for your specific model, wait for the display to stabilize at zero, and verify results with known weights. For smart scales, keep firmware updated and re-pair devices after resets.
Preventive care extends scale life significantly. Clean the platform weekly, calibrate every few months, store in dry conditions, and avoid exceeding maximum capacity. When repairs aren’t practical, invest in a replacement with quality load cells and app compatibility for long-term reliability.



