
Is your Taylor scale displaying error codes, showing inconsistent readings, or refusing to turn on entirely? You are not alone. These frustrating issues affect thousands of users every year, but the good news is that most problems can be resolved at home without any technical expertise or special tools. This comprehensive guide walks you through every proven troubleshooting step, from simple battery resets to advanced calibration procedures and internal repairs. Whether you own a basic bathroom model or an advanced body composition scale, you will learn exactly how to restore your Taylor scale to full functionality and accurate performance.
By the end of this guide, you will understand how to diagnose specific error codes, perform professional-grade resets, calibrate for precision, and know when it is time to replace your scale entirely. Let us get your Taylor scale working like new again.
Replace and Reset Batteries
Dead, weak, or improperly installed batteries cause the majority of Taylor scale malfunctions. Before assuming your scale has suffered hardware failure, you must rule out power issues completely.
Use the Correct Battery Type
Taylor scales typically use one of several battery configurations depending on your specific model. Most digital bathroom scales require a CR2032 lithium coin-cell battery. Some older or larger models use AA or AAA batteries, while a few specialized units like the Taylor 7519 may require a 9V battery. Always check your battery compartment or user manual to confirm the correct type for your specific model. Using the wrong battery type will prevent your scale from functioning properly.
When replacing batteries, always choose fresh, high-quality cells from reputable brands. Even batteries that appear to have some charge remaining may lack the power needed to operate your scale reliably. Avoid expired batteries or those that have been sitting in a drawer for months.
Install With Proper Polarity
Proper battery installation requires attention to polarity alignment. Open your battery compartment and locate the plus (+) and minus (-) symbols inside. Match the positive end of your battery to the positive marking and the negative end to the negative marking. This alignment is critical because reversed polarity can damage internal circuits or prevent the scale from turning on.
Before inserting new batteries, inspect the contacts inside the compartment. If you notice any white crusty buildup from previous battery leaks, clean the contacts gently with a dry cloth or cotton swab. Remove any plastic insulating tab that may still be present on new batteries, as this tab prevents discharge during storage but must be removed for the battery to function.
Perform a Full Power Reset
If your Taylor scale will not turn on, displays Error 0, or exhibits erratic behavior, a full power reset often resolves the issue. This process clears corrupted internal memory and allows the scale to recalibrate properly.
Remove the battery from your Taylor scale completely. Place it aside and wait exactly 30 minutes before reinserting the battery. This wait period is essential because it allows all internal capacitors to discharge fully and resets the scale’s memory. Rushing this step is the most common reason reset attempts fail.
After the waiting period, reinsert the battery with correct polarity. Place the scale on a hard, flat floor surface such as tile or hardwood. Tap lightly with one foot to activate the scale, but do not step fully onto it yet. Wait for the display to show “0.0” or dashes, which indicates the scale has initialized properly. Only then should you step on normally for a reading.
Some Taylor scale models include a dedicated reset button, typically located on the bottom or side of the unit. If your model has this button, you can use it as an alternative reset method by pressing it with a paperclip for approximately 5 seconds.
Decode Common Error Codes
Taylor scales use specific error codes to communicate what is preventing proper operation. Understanding these codes helps you diagnose the exact problem and apply the correct solution without wasted effort.
Error 1: Scale on Soft Surface
Error 1 indicates that your Taylor scale has detected instability, which typically means it is placed on a soft or uneven surface. Carpet, rugs, and cushioned flooring absorb weight unevenly and prevent the internal sensors from registering properly. This error also occurs when the scale sits on tile with pronounced grout lines or on an uneven floor.
The fix is straightforward: move your Taylor scale to a hard, flat surface such as ceramic tile, hardwood flooring, or concrete. Avoid carpet, vinyl cushion flooring, and any surface that has give when you press down. If you must use the scale in a carpeted area, place a rigid cutting board or flat panel under the scale to create a stable surface. Test the placement by ensuring the scale does not wobble when you press gently on one corner.
Error 2: Overload or Impact Damage
Error 2 appears when the scale has detected weight exceeding its maximum capacity or has experienced a sharp impact. Most Taylor scales have a maximum weight capacity of 400 pounds or 180 kilograms. Exceeding this limit triggers the overload protection, which prevents damage to the internal load cells.
This error also appears if the scale was dropped or subjected to sudden jarring movement. The internal sensors can become misaligned from impact, requiring recalibration to function correctly again. Always handle your scale carefully and avoid stepping on it abruptly or jumping onto the platform.
To resolve Error 2, first ensure you are not exceeding the weight capacity. If the error appeared after dropping the scale, perform the advanced technician reset procedure to recalibrate the load cells. Avoid placing heavy objects on the scale or using it as a step stool.
Error 3: Foot Contact Failure on Body Fat Models
Error 3 occurs specifically on Taylor body composition scales that measure body fat, hydration, or muscle mass using bioelectrical impedance analysis. This error means the scale cannot complete the electrical circuit through your body, which is required for measuring these metrics.
The most common cause is dry skin or wearing socks, which insulate your body from the sensors. Body fat scales require bare feet contact with the metal sensor pads to send a harmless electrical signal through your body. If your feet are too dry or you are wearing socks, the circuit cannot complete.
The solution is simple: use bare feet and slightly dampen the soles with water before stepping on the scale. The moisture helps conduct the electrical signal. Stand centered on the scale with your heels and the balls of your feet making full contact with the sensor pads. Avoid shifting your weight during the measurement process.
Error 4 and Error 5: Out-of-Range Readings
Error 4 and Error 5 are not malfunctions but rather indicators that your body composition falls outside the measurement range of the scale. Error 4 appears when body fat readings are below 3% or above 60%, which is extremely rare in healthy individuals. Error 5 indicates hydration levels below 35% or above 75%.
These errors reflect extreme body composition rather than scale failure. Athletes with very low body fat percentages may encounter Error 4, while individuals with certain medical conditions may see Error 5. No action is required unless you believe the readings should fall within normal ranges. If these errors persist despite normal body composition, consider consulting a healthcare professional.
Perform Advanced Technician Reset
When standard battery resets and surface corrections fail to resolve your Taylor scale issues, the advanced technician reset often succeeds where simpler methods fail. This procedure reinitializes the internal load cell calibration and is particularly effective after moving the scale, dropping it, or experiencing persistent Error 1 or Error 2 messages.
Step-by-Step Recalibration
Begin by removing the battery from your Taylor scale completely. Place the scale on a hard floor surface such as tile or hardwood, ensuring it is not on carpet or any soft material. Stand on the scale barefoot for a full 10 seconds without the battery installed. This step allows the internal sensors to discharge and reset naturally.
After the 10 seconds have elapsed, step off the scale and reinsert the battery carefully, ensuring proper polarity alignment. Do not press any buttons during this process. Place the scale back on the same hard floor surface in the same orientation.
Tap the scale once gently with one foot to activate it, then immediately remove your foot. Wait for the display to show “0.0” or dashes, indicating the scale has initialized successfully. The display may turn off automatically after a few seconds. Once you see the stable zero reading, step on normally for a full reading.
This advanced reset has an impressive success rate of over 80% for persistent error codes and calibration issues. It works by resetting the load cell calibration, which can drift over time or after physical disturbance.
Calibrate for Accurate Readings
Even when your Taylor scale turns on and displays readings, accuracy can drift over time. Regular calibration ensures your scale provides reliable measurements for weight and body composition metrics.
Auto-Calibration Procedure
All Taylor scales perform auto-calibration when powered on correctly. After replacing batteries or performing a reset, place your scale on a hard, flat surface. Tap gently with one foot to activate the display. Wait for the screen to show “0.0,” “CAL,” or dashes before stepping on. This stabilization period is critical for accurate readings.
Do not step on the scale until the display has stabilized completely. Stepping on too early can cause inaccurate readings and may trigger error codes. The auto-calibration process takes only a few seconds but ensures the internal sensors are properly initialized.
Manual Calibration for Select Models
Some Taylor scale models support manual calibration, which gives you greater control over accuracy. This feature is typically found on higher-end body composition scales. To perform manual calibration, turn on the scale and wait for the display to show “0.0.”
Press and hold the unit button (labeled lb/kg/st or similar) for 5 to 10 seconds. Watch for the display to show “CAL” or “8888,” indicating calibration mode has been activated. Place a known weight item in the center of the platform. This can be a certified calibration weight, a dumbbell of known weight, or any object whose weight you have verified on another scale.
Wait 3 to 5 seconds for the display to register the weight. Remove the weight and the scale should return to zero. If it does not, repeat the process. Always use weights that fall within your scale’s capacity and avoid exceeding 400 pounds during calibration.
Fix Fluctuating Readings
If your Taylor scale displays numbers that jump around or refuse to stabilize, several factors may be responsible. An unstable surface, vibration from nearby fans or HVAC systems, or temperature changes can all cause erratic readings.
Ensure your scale sits on a vibration-free surface away from air currents. Avoid placing it near running fans, air conditioners, or heating vents. Use bare feet only, as socks and slippers reduce sensor accuracy. If you have recently moved the scale or experienced temperature changes, perform a recalibration to restore stable readings.
Repair Internal Hardware
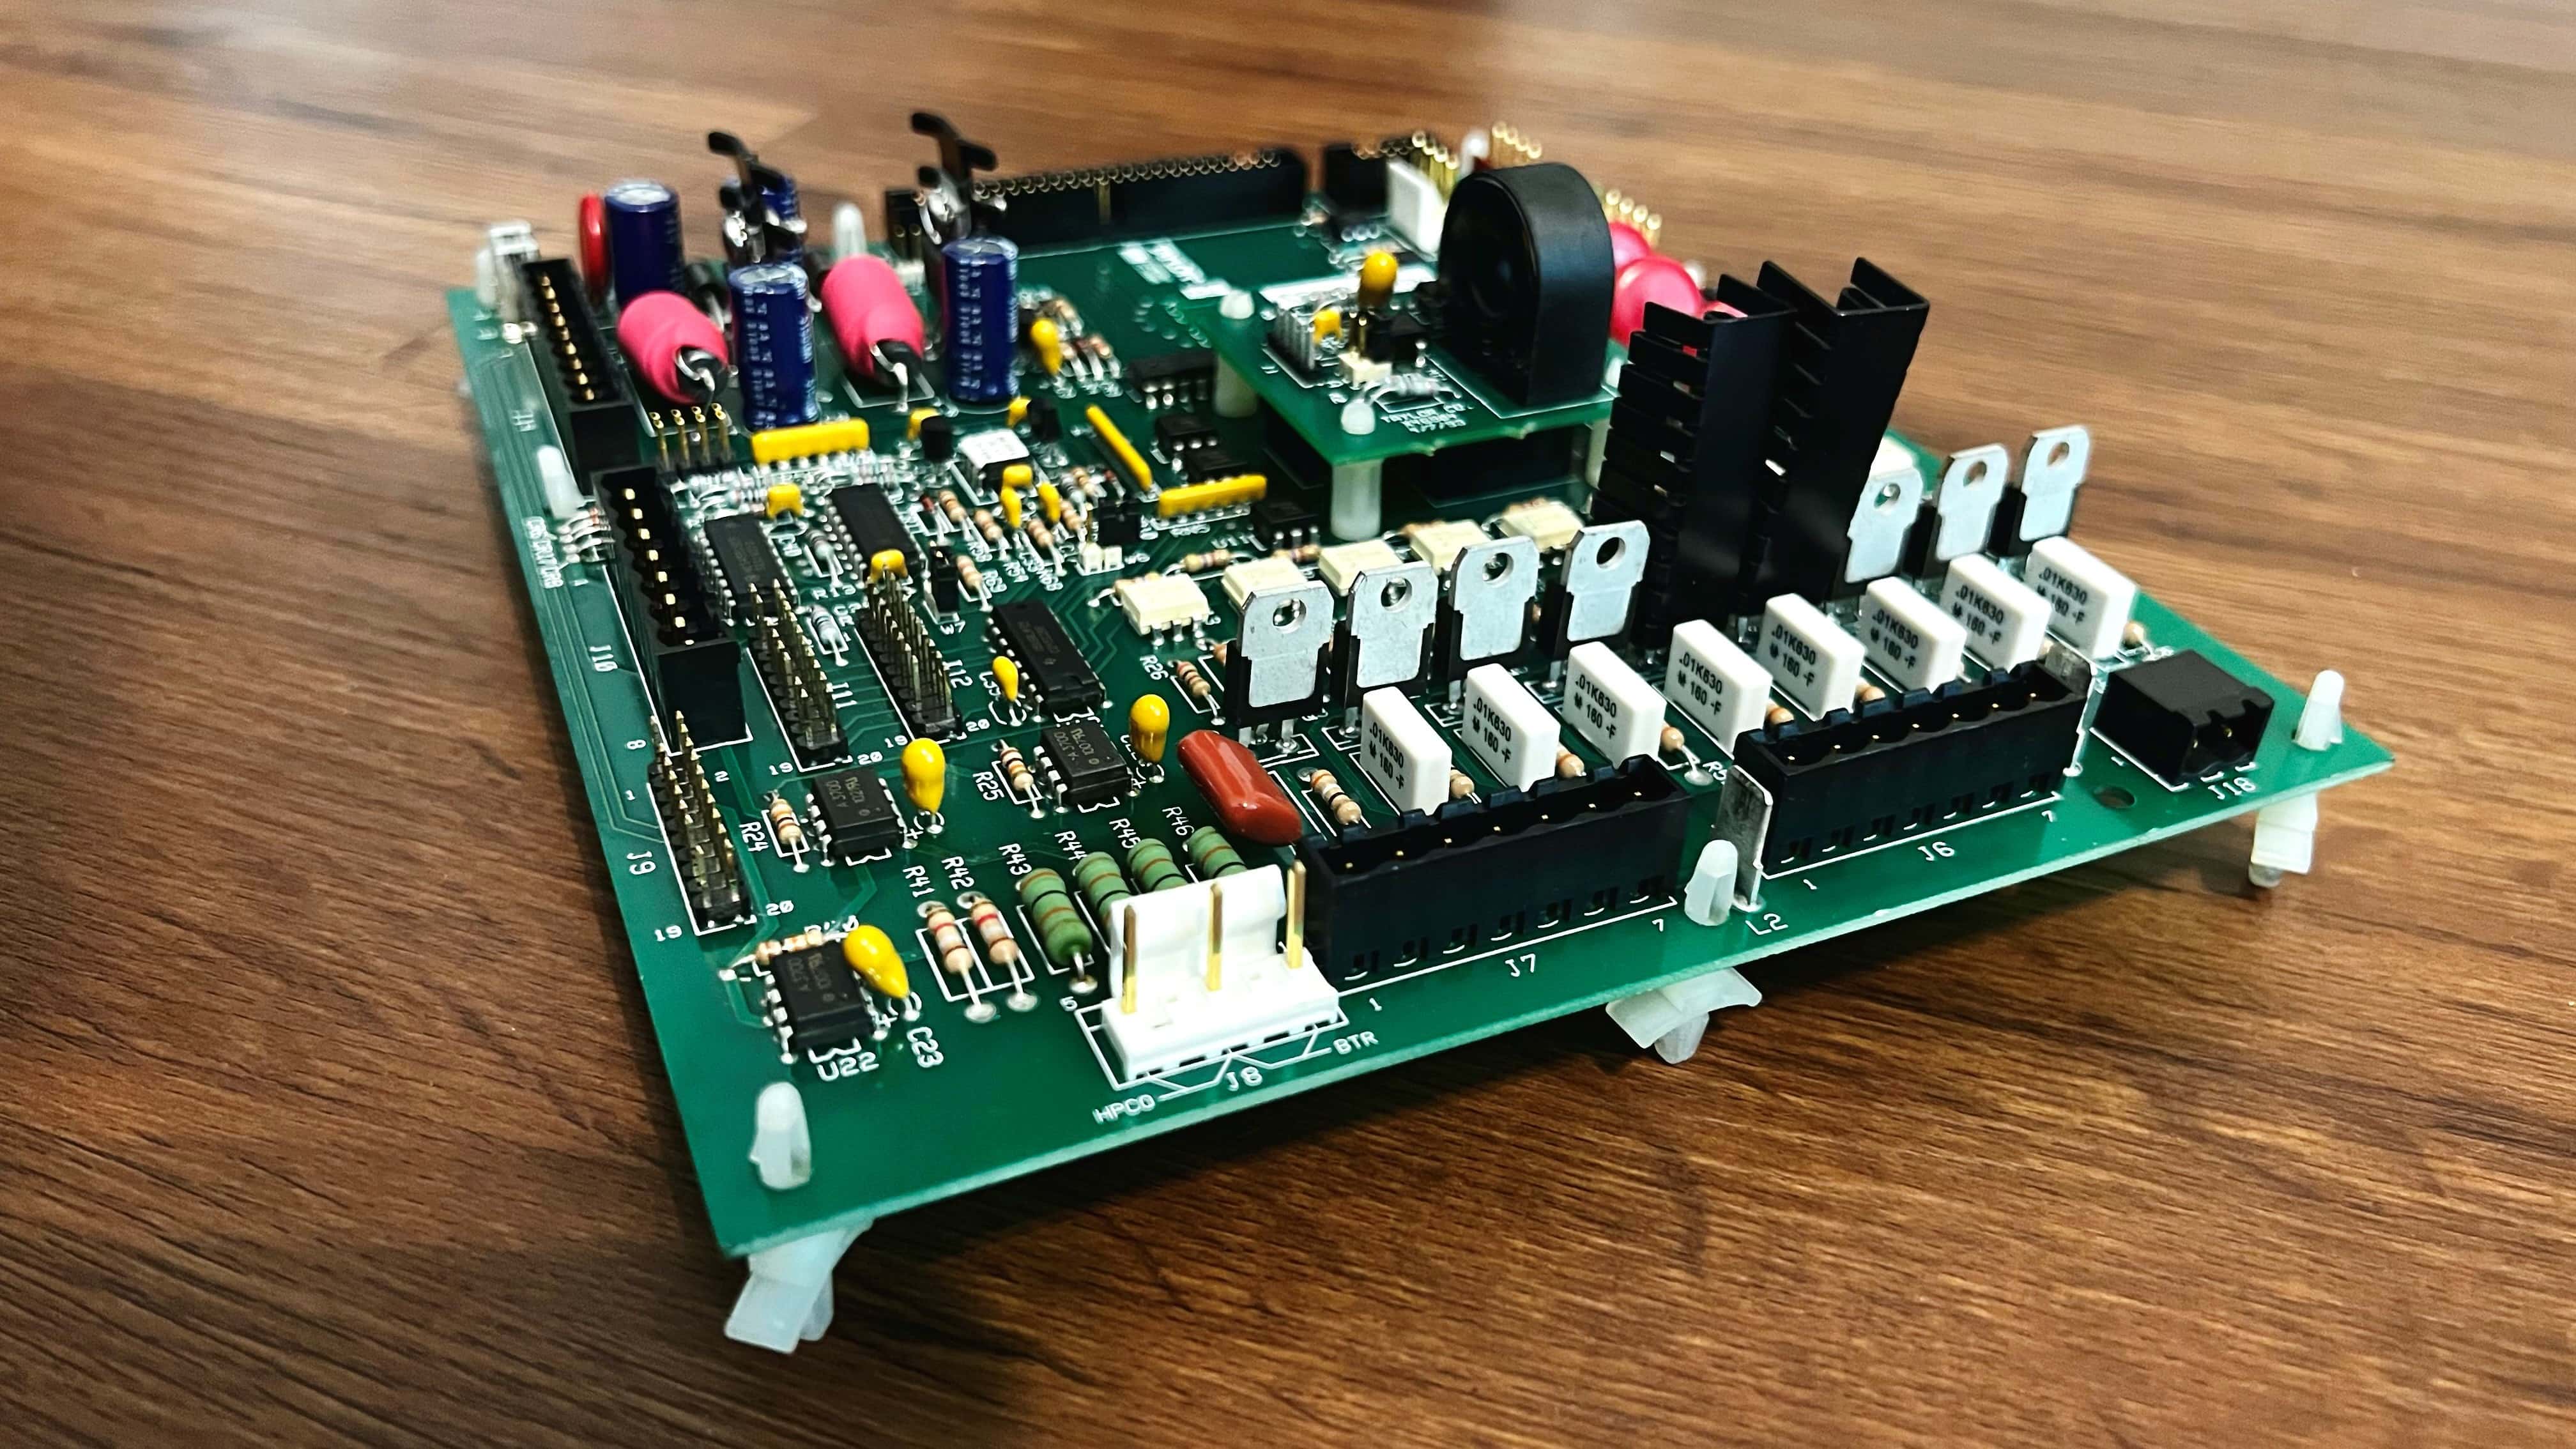
If your Taylor scale remains unresponsive after all reset and calibration attempts, internal hardware inspection may be necessary. This step is only recommended for users comfortable working with electronics, as disassembly will void your warranty.
Disassemble Safely
Gather a Phillips screwdriver, cotton swabs, and isopropyl alcohol before beginning. Remove all screws from the back panel of your Taylor scale. Work carefully to avoid cracking the plastic casing. Once opened, disconnect the battery to prevent short circuits.
Inspect the circuit board and internal sensors for visible damage. Look for frayed wires, particularly near connector points. Check the battery terminals for corrosion. Examine the pressure switches, which are small black rubber domes located under the platform that register weight.
Fix Common Internal Failures
Broken wires near connectors are a frequent cause of scale failure. If you identify frayed or broken wires, re-solder them using a fine-tip soldering iron. Secure repaired connections with electrical tape for added stability.
Damaged pressure switches can cause inaccurate or no readings. If a rubber dome has become detached or cracked, reattach it with a tiny drop of cyanoacrylate glue. Apply the adhesive only to the base of the switch, avoiding the moving portion that must compress when weight is applied.
Corroded battery contacts can prevent proper power delivery. Clean corroded areas with isopropyl alcohol and a soft brush. Allow the components to dry completely before reassembling the scale.
On models like the Taylor 7519, a blue LED light indicates successful power restoration. If you see this LED illuminate after reassembly and battery installation, your circuit integrity has been restored.
Optimize Placement and Surface
The surface where you place your Taylor scale significantly impacts its performance and accuracy. Many user complaints about errors or inaccuracies stem from improper placement rather than actual hardware failures.
Best Surfaces for Accurate Readings
Your Taylor scale performs best on rigid, level surfaces such as ceramic tile, hardwood floors, concrete, and solid laminate flooring. These surfaces provide the stability necessary for accurate load cell operation. Place your scale against a wall or in a corner to prevent accidental bumps during use.
Avoid high-traffic areas where the scale might be kicked or moved frequently. Choose a location with consistent temperature and humidity levels, away from bathrooms where moisture and temperature fluctuations are common.
Surfaces to Avoid
Never place your Taylor scale on carpet, rugs, or any cushioned flooring. These surfaces compress under weight, causing the scale to register incorrectly and triggering Error 1. Even thin rugs can cause problems, so always test by pressing down on the surface. If it gives at all, find a harder location.
Uneven tile surfaces with grout lines can also cause problems. The grooves between tiles create instability that affects readings. If you must place your scale on tile, choose a single tile area without grout lines, or place a rigid board under the scale.
Maintain Accuracy With Routine Care
Regular maintenance extends the life of your Taylor scale and ensures consistent accuracy. Simple habits prevent most common problems before they develop.
Weekly Cleaning and Storage
Wipe your Taylor scale weekly with a damp cloth and mild soap. Never immerse the scale in water or use harsh chemical cleaners, as moisture can damage internal electronics. Dry the scale thoroughly after cleaning and store it in a dry location.
Avoid storing your scale in bathrooms where humidity levels fluctuate dramatically. Extreme temperatures below 40°F or above 95°F can damage electronic components. Keep the scale in a climate-controlled area away from direct sunlight.
Consistent Usage Habits
Weigh yourself at the same time each day for the most consistent results. Morning weigh-ins after using the bathroom provide the most stable baseline. Always step on the scale barefoot and stand centered on the platform. Remain still during the measurement process and avoid shifting your weight.
Most accurate readings appear within 2 to 5 seconds of stepping on. If you move around or step off too quickly, you may get inaccurate results. Develop a routine and stick to it for the best tracking over time.
Know When to Replace
Some Taylor scale problems cannot be fixed with troubleshooting. Knowing when to replace your scale saves time and prevents frustration.
Signs You Need a New Scale
Replace your Taylor scale if the display is cracked, dim, or shows missing segments. If all reset methods fail even with fresh batteries, the internal electronics have likely failed. Visible internal damage such as a burnt circuit board, broken sensors, or melted components indicates permanent failure.
Persistent Error 0, Error 1, or Error 2 messages after multiple reset attempts suggest hardware issues that cannot be resolved through calibration. If your scale is several years old and the cost of repair approaches the price of a new unit, replacement is the practical choice.
Warranty and Support Options
Taylor scale products typically include 1 to 5-year limited warranties depending on the model. If your scale is still under warranty and experiencing problems, contact Taylor customer support before attempting repairs. You may qualify for a free replacement.
Reach Taylor support by phone at 1-800-999-1535 or visit www.taylorusa.com to submit a warranty claim. Have your model number and purchase information ready when contacting support. Online claims can often process faster than phone calls.
Quick Troubleshooting Checklist
Use this step-by-step flow to quickly diagnose and fix your Taylor scale issues.
Step 1: Replace Batteries
Start by replacing old batteries with fresh ones of the correct type. Clean the battery contacts with a dry cloth to ensure good electrical connection. Verify proper polarity alignment when inserting new batteries.
Step 2: Reset Internal Memory
Remove the battery and wait 30 minutes to fully discharge internal memory. Reinstall the battery and tap gently with one foot to activate. Wait for the display to stabilize at zero before stepping on.
Step 3: Check Your Surface
Move your Taylor scale to a hard, flat floor surface. Avoid carpet, rugs, and uneven tiles. Test placement by ensuring the scale does not wobble when pressed.
Step 4: Interpret Error Codes
| Code | Meaning | Solution |
|---|---|---|
| Error 1 | Soft surface | Move to hard floor |
| Error 2 | Overload or impact | Reduce weight, recalibrate |
| Error 3 | Contact failure | Use damp bare feet |
| Error 4/5 | Out of range | Normal reading, no fix needed |
Step 5: Recalibrate
Perform the advanced technician reset by standing on the scale without battery power. Use manual calibration if your model supports it.
Step 6: Inspect Internally
If all else fails, open the case and check for broken wires, damaged pressure switches, or corroded contacts. Repair or clean as needed.
Step 7: Contact Support
If nothing resolves the issue, check your warranty status and contact Taylor customer support for replacement options.
Key Takeaways for Fixing Your Taylor Scale
Most Taylor scale issues stem from simple causes like weak batteries, improper surface placement, or calibration drift. Always start by replacing batteries with fresh cells and verify your scale sits on a hard, flat surface. The 30-minute battery reset clears corrupted memory and resolves most startup problems. Error codes specifically indicate what is wrong: Error 1 means surface issues, Error 2 indicates overload or impact, and Error 3 relates to body composition sensor contact. Only attempt internal repairs if you are comfortable with electronics and your scale is out of warranty. With proper care and systematic troubleshooting, your Taylor scale can provide accurate readings for many years. When in doubt, contact Taylor support directly, as warranty claims often result in free replacements.



