
If your spring scale no longer reads accurately or the needle won’t move, you’re not alone. Mechanical spring scales—common in kitchens, workshops, and bathrooms—often fail due to dropped impacts, overloading, or wear over time. The good news? Most issues like a stuck needle, inaccurate readings, or a non-zero resting position can be fixed at home with basic tools and careful reassembly. This guide shows you exactly how to diagnose, disassemble, repair, and recalibrate a spring scale using proven techniques.
Disassemble the Scale Safely
Before fixing any internal components, you must open the scale without damaging fragile parts. Place the scale upside down on a soft cloth to protect the surface. Look for screws or locking clips on the bottom. Use a flathead or Phillips screwdriver to remove them. Some models have a top-access design—check for visible fasteners on the top rim. Gently pry the housing apart using a screwdriver, starting at the seam. Keep the top and bottom connected until you visually confirm how internal linkages are routed.
Remove Base or Top Cover
- Place the scale upside down on a padded surface.
- Locate and remove all screws or locking clips on the bottom panel.
- If your model has top fasteners, remove those instead.
- Carefully pry the housing apart starting at the seam.
- Keep both halves connected until you’ve inspected the internal routing.
Protect Internal Components
Once opened, place all small parts into a labeled container. Lay out disassembled pieces in order of removal to simplify reassembly. Avoid pulling wires or forcing stiff joints. If the dial assembly feels stuck, don’t twist it—inspect for hidden clips first.
Pro Tip: Take photos at each disassembly step. They’ll serve as a visual guide when reassembling.
Identify Key Internal Components

Knowing what each part does helps you spot misalignments and missing pieces. Inside the scale, find the two slender iron rods that transfer force from the platform. These are labeled S1 and S2. You’ll also locate Spring A (the spring attachment arm connected to the dial), Component G (the broad spring base that A must rest on), and the calibration screw R on top of the dial. The zero-adjustment wheel W sits on the front face, while O1 and O2 are rings where S1/S2 rods attach. Cutouts C1 and C2 secure rod ends, and holes H1 and H2 are for twine routing.
Locate Critical Linkage Parts
Ensure all parts are present and undamaged before proceeding. Bent rods or stretched springs cause inaccurate readings.
Key components to verify:
- S1 and S2: Iron rods transferring force from platform
- Spring A: Attachment arm connected to dial
- Component G: Broad spring base
- R: Calibration screw on dial top
- W: Zero-adjustment wheel on front
- O1, O2: Rings for rod attachment
- C1, C2: Cutouts securing rod ends
- Auxiliary springs and twine: Suspension system
Reinstall Linkage Rods Correctly
If your scale shows no response to weight, the S1 and S2 rods are likely dislodged. Insert one end of rod S1 through ring O1 on beam B1. Slide the other end into cutout C1 on the frame. Repeat for S2 with O2 and C2. Both rods should pivot freely. If they bind, check for debris or bent metal.
Align Rods with Beams and Cutouts
- Insert S1 through ring O1 on beam B1.
- Slide the other end into cutout C1.
- Repeat for S2 with O2 and C2.
- Verify both rods move freely without binding.
Warning: Misaligned rods block force transmission—your scale will read zero even when loaded.
Test Movement Before Proceeding
Press down gently on the platform area. The rods should move upward smoothly, lifting the spring-dial mechanism. If movement is stiff or uneven, realign the rods and verify they sit flush in the cutouts.
Reattach the Main Spring and Dial Arm
A loose or misrouted spring is a top cause of a non-moving needle. Lift the broader spring base (G) slightly. Rotate arm A so its small lever rests on top of G—not beneath or beside it. This ensures the spring pulls the dial correctly when weight is applied.
Position Spring Attachment Arm Over G
When properly seated, the narrow spring beneath the dial should appear taut, not slack. Press the platform gently after positioning. The needle should move in response. If it doesn’t, double-check that arm A is fully engaged with G and no twine is snagged on the mechanism.
Calibrate the Dial to Zero
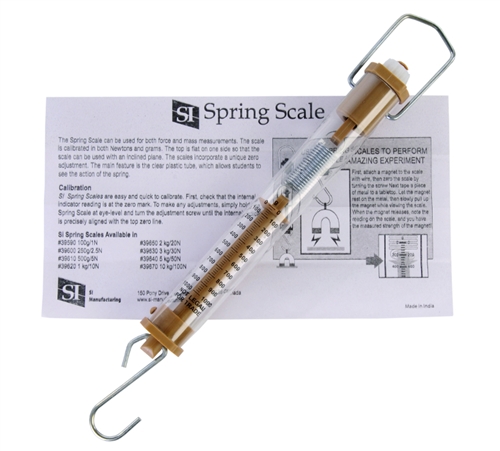
Even with correct assembly, the needle may not return to zero. Loosen the small screw (R) on top of the dial. Rotate the dial face until the needle points close to zero. Tighten the screw gently—overtightening can strip the plastic housing.
Adjust Dial Face Internally
Once reassembled, use the external zero-adjustment wheel (W) to set the needle exactly to zero with no load. Turn clockwise or counterclockwise until alignment is perfect.
Pro Tip: This two-stage calibration (R for coarse, W for fine) ensures precision.
Reinstall Suspension Twine and Springs
The suspension system maintains tension across the scale’s frame. Attach the two small auxiliary springs to the back of the top cover. Tie one end of a twine piece to each spring. Thread the other end through H1 and H2 on the base plate. Pull the twine through the large hole, then loop the loose end into the bridge—the raised section between the large and small holes.
Hang Auxiliary Springs and Thread Twine
This routing locks the twine in place under tension. Both sides must have equal tension. Uneven twine causes the platform to tilt and readings to drift.
Critical Step: Check that both suspension sides have equal tension before closing the housing.
Reassemble the Scale Body
Now that components are aligned, it’s time to close the housing. With the scale disassembled, turn it right-side up slowly. Use one hand to press the top and base plates together firmly to prevent springs or rods from shifting.
Invert While Holding Plates Together
Align the top and bottom covers. Reinsert screws or snap clips back into place. If the housing resists closing, don’t force it—open it again and check for pinched twine or misaligned rods.
Secure Suspension and Balance Tension
Final tensioning ensures accurate and smooth operation. One at a time, pull each twine tight. Then press the loose end of the auxiliary spring into the bridge area on the base plate. Repeat for both sides.
Pull Twine Taut and Lock Springs
Check that the scale platform sits flat and doesn’t wobble. Apply light pressure to each corner—if one side dips, re-tighten the corresponding twine.
Warning: Loose suspension leads to inconsistent readings and needle sticking.
Test and Calibrate the Scale
Final testing confirms your repair succeeded. Place the scale upright. Press the platform lightly—the needle should move smoothly and return to zero when released. If it sticks, inspect pivot points for dirt or misalignment.
Check Needle Movement
Use a verified weight: a 1 kg bag of sugar, a liter of water, or a 5 lb dumbbell. Place it on the scale and compare the reading.
| Expected Weight | Observed Reading | Action |
|---|---|---|
| 1 kg | 1.2 kg | Adjust dial via R and retest |
| 5 lb | 4 lb | Recheck spring tension and linkage |
| 0 lb | 0.5 lb | Use front wheel W to reset zero |
Expert Note: For best accuracy, test at multiple weights to ensure linearity.
Troubleshoot Common Problems
Even after reassembly, issues may persist. Use this guide to fix them fast.
Needle Doesn’t Move
Cause: Disconnected linkage or slack spring.
Fix: Recheck S1/S2 rod alignment and ensure arm A is on top of G.
Scale Reads Non-Zero When Empty
Cause: Misaligned dial or faulty zero wheel.
Fix: Loosen screw R, rotate dial to zero, retighten, then fine-tune with wheel W.
Inconsistent or Jumping Readings
Cause: Loose twine, worn pivot points, or debris.
Fix: Re-tension suspension, clean joints with a dry cloth, avoid lubricants.
Sticking or Jerky Needle
Cause: Rust, bent parts, or friction in the gear system.
Fix: Inspect for visible damage. Clean with isopropyl alcohol on a cotton swab—do not oil.
Scale Tops Out Too Early
Cause: Overstretched main spring or broken support beam.
Fix: Replace the spring if possible. If the beam is cracked, the scale may be beyond repair.
Source Replacement Parts
Original parts are rarely sold, but alternatives exist. Rods (S1/S2) can be made from straightened coat hanger wire or welding rod (3–4 mm diameter). Springs can be harvested from old bathroom or kitchen scales. Use nylon cord or fishing line for twine—strong and stretch-resistant. Search eBay or AliExpress for “analog scale dial mechanism.”
Reality Check: Some scales can’t be fully repaired if castings are broken. Focus on models with modular designs.
Maintain Accuracy Long-Term
Prevent future failures with simple habits. Never exceed the max weight marked on the dial. Overloading stretches the spring permanently. Keep the scale in a dry place—humidity causes rust on springs and pivots. Wipe the platform with a damp cloth—never submerge the scale. Dirt in linkages causes sticking. Use the zero-adjustment wheel (W) to reset the needle before each use if needed.
Frequently Asked Questions About Fixing a Spring Scale
Why won’t the needle move on my spring scale?
The most common cause is disconnected linkage rods (S1/S2) or a loose spring attachment arm (A). Check that the rods are seated in their rings (O1/O2) and cutouts (C1/C2), and verify that arm A rests on top of component G.
How do I calibrate a spring scale to read zero?
Loosen the small calibration screw (R) on top of the dial, rotate the face until the needle points near zero, then retighten. Use the external zero-adjustment wheel (W) for fine-tuning once the scale is fully reassembled.
Can I replace broken springs in a spring scale?
Original replacement parts are rarely available, but you can salvage springs from old bathroom or kitchen scales. Alternatively, search online marketplaces for “analog scale dial mechanism” or fabricate replacements from similar-sized springs.
What causes inaccurate readings on a spring scale?
Inaccurate readings typically stem from misaligned linkage rods, uneven suspension twine tension, or a stretched main spring. Check that both S1 and S2 rods move freely, ensure equal tension on both suspension sides, and test with known weights.
How do I fix a sticking or jerky needle?
Clean pivot points with a dry cloth or isopropyl alcohol. Avoid lubricants—they attract dust and can make sticking worse. Inspect for bent components or rust that may be causing friction.
Is it worth repairing an old spring scale?
Yes, most common failures involve dislodged linkages, misaligned dials, or loose suspension—issues you can resolve in under 30 minutes with basic tools. Part scarcity may limit full restoration in some cases, but careful reassembly often brings old scales back to reliable service.
Key Takeaways for Fixing Your Spring Scale
Fixing a spring scale is a satisfying DIY win. Most problems stem from loose linkages, misaligned dials, or slack suspension—issues you can resolve in under 30 minutes with basic tools. By following these steps, you restore accuracy and extend the life of your scale without buying a replacement.
The repair process centers on careful disassembly, proper reinstallation of the S1/S2 rods and spring attachment arm (A), and dual-stage calibration using both the internal screw (R) and external wheel (W). Equal tension in the suspension twine is critical for accurate, consistent readings.
While part scarcity limits full restoration in some cases, careful reassembly and calibration often bring even old or dropped scales back to reliable service. Keep this guide handy for your next repair—and weigh with confidence.



