Is your digital scale suddenly showing only 0.1g instead of 0.01g? Are readings drifting, inconsistent, or failing to zero? You’re not alone. Thousands of users face the same issue with their precision gram scales. The good news is that most scale problems are fixable without replacing the unit. This guide walks you through exactly how to fix a scale to measure in grams accurately, from diagnosing the core issue to recalibrating for reliable precision.
Diagnose Why Your Gram Scale Isn’t Working Properly
Before attempting any fixes, identify what is actually wrong. Many users assume hardware failure, but roughly 90% of scale issues stem from software settings, calibration problems, or environmental factors.
Check for Common Symptoms
Look for these telltale signs that your scale needs attention.
• Inconsistent or drifting readings: numbers climb or drop after stabilization
• Fails to return to 0.00g: leaves a residual value after removing weight
• Stuck at 0.1g resolution: no longer displays two decimal places
• Error codes appear: “-“, “Err”, “0 L.D.”, or flashing display
• Won’t power on: dead or weak batteries, poor contact
• Calibration fails: prompts for weight but does not accept it
Rule Out Environmental Causes
Even a perfectly functioning scale fails under poor conditions. Move your scale to a hard, level, draft-free surface before proceeding. Common environmental culprits include drafts from fans or air conditioning, soft or uneven surfaces like carpet, nearby electronics such as phones and microwaves, and static electricity in dry environments.
Restore 0.01g Resolution on Your Digital Scale
One of the most frequent complaints is that a scale used to show 0.01g but now only displays 0.1g. This is not broken; it is in the wrong mode.
Why Resolution Gets Lost
Resolution changes happen after battery replacement or power loss, accidental button presses during storage, physical shock or drop, or auto-reset following an overload. The firmware defaults to coarse mode, hiding the precision you need.
Fix: Reset and Re-Enter 0.01g Mode
Step 1: Perform a Hard Reset
Remove batteries or disconnect power. Wait five minutes to discharge internal capacitors. Insert fresh batteries. Power on without pressing any buttons yet. This clears corrupted settings.
Step 2: Activate Resolution Toggle
Turn the scale off. Press and hold MODE, UNIT, or TARE. While holding, press ON/OFF to power on. Keep holding until the display cycles through resolution options. Release when “0.01g” appears.
Common button combinations that work include MODE plus ON, UNIT plus TARE, or TARE plus ON. If one does not work, try another. Some models require two quick presses after power-on.
Step 3: Confirm and Test
Let the scale reboot. Place a small object such as a coin on the platform. Verify two decimal places appear, for example 2.50g.
After restoring 0.01g mode, you must recalibrate the scale. Otherwise, resolution will be correct but accuracy will still be off.
Calibrate Your Scale for Accurate Gram Readings

Restoring resolution is only half the battle. Without proper calibration, your scale may show 0.01g but deliver wildly inaccurate readings.
When to Calibrate
Calibrate after restoring 0.01g mode, following battery replacement, after moving the scale, every one to four weeks for regular use, or if readings drift or fail consistency tests. Never calibrate in 0.1g mode because this locks the sensor to coarse accuracy even if you switch back later.
Step-by-Step Calibration
Step 1: Prepare the Environment
Use a flat, hard surface such as glass, granite, or wood. Avoid vibrations, drafts, and electronics. Let the scale acclimate for 30 minutes or more if moved from cold to warm temperatures.
Step 2: Warm Up the Scale
Turn it on. Wait for 0.00g to stabilize, typically 30 to 60 seconds.
Step 3: Enter Calibration Mode
Press and hold CAL, MODE, or UNIT. The screen will show CAL, “–“, and a flashing weight such as 100.00.
Step 4: Zero the Scale
Ensure the platform is empty and clean. Some models beep or flash a dot when zero is confirmed.
Step 5: Apply Calibration Weight
Place the correct weight in the center of the platform. Use 100g for 200g to 500g capacity scales, or 500g for larger models. Do not touch the scale during calibration.
Step 6: Wait for Confirmation
Look for PASS, END, or GOOD, a dot in the corner, or auto-return to 0.00g.
Step 7: Remove Weight and Reboot
Only remove the weight after confirmation appears. Power off and on. Test with known objects.
Use the Right Calibration Weight for Your Scale

Using the wrong weight is the number one reason calibration fails.
Best Option: Certified Calibration Weights
Use NIST-traceable weights such as those from TruWeigh or Adam Equipment. Class M1 offers tolerance of plus or minus 5mg, while Class M2 offers plus or minus 10mg. Both work well for home use. Store weights in a case and handle with tweezers.
Emergency Alternatives
U.S. Coins
A nickel from 1966 onward weighs 5.0g and is the most reliable option. A penny from 1983 onward weighs 2.5g but shows slight variation. A quarter weighs 5.67g but has higher variance due to wear.
For example, 20 nickels equal 100g, which is ideal for calibration. Never use circulated coins as a permanent standard because they lose mass over time.
Water Method
One milliliter of water equals 1g at 4°C. Use distilled water and a graduated cylinder. Tare the container first, then add 100ml to equal 100g. This works well for 0.1g scales but is less ideal for 0.01g due to evaporation.
Troubleshoot Common Scale Error Codes
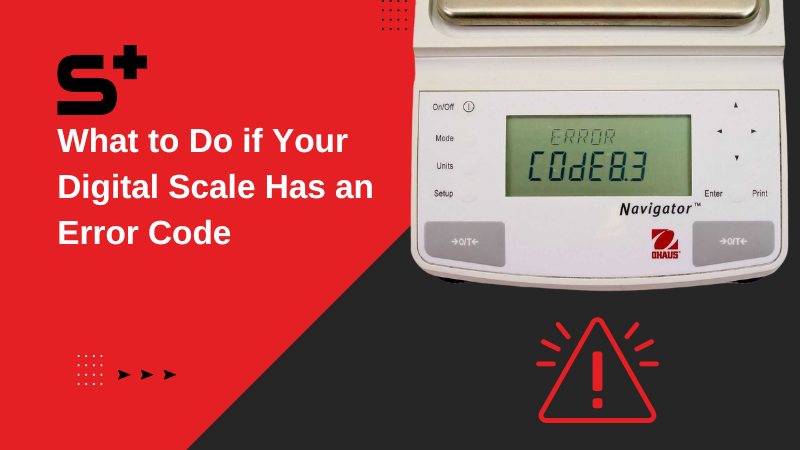
Scale Shows “-” or “Err”
Unstable surface, low battery, or overload causes this. Re-level the surface, replace batteries, and ensure no object is on the scale before turning on.
Readings Drift Over Time
Drafts, static, or vibration are usually responsible. Move away from fans or vents. Place on a rubber mat or mousepad. Ground yourself before use.
Inconsistent Results
A dirty platform or worn sensors cause this. Clean with a damp microfiber cloth. Use compressed air for crevices. Recalibrate afterward.
“0 L.D.” (Overload Error)
Exceeding maximum weight triggers this, such as placing 600g on a 500g scale. Remove weight immediately and power cycle. Never exceed capacity because this can permanently damage the load cell.
Won’t Turn On
Dead batteries or dirty contacts are the culprit. Replace with fresh alkaline batteries. Clean terminals with a dry cloth. Check battery polarity.
Clean and Maintain Your Gram Scale
A dirty scale is an inaccurate scale.
Weekly Cleaning Routine
Brush the platform with a soft-bristled brush. Wipe with a damp, soapy microfiber cloth. Dry immediately with a lint-free towel. Blow out crevices with compressed air. Never soak or rinse the scale because water damages circuits.
Battery Care
Replace batteries when the display dims, readings jump or freeze, or auto-off triggers too quickly. Clean contacts monthly. Use alkaline or lithium batteries and avoid rechargeables unless specified.
Optimize Placement and Environment for Precision
Even a calibrated scale fails in a bad location.
Ideal Setup
Use a hard, flat, level surface and check with a spirit level. Keep away from HVAC vents, fans, and appliances. Place on a rubber mat to reduce vibration. For 0.01g scales, use a draft shield to block air currents. Use an anti-static wipe or increase humidity to control static.
Verify Your Scale’s Calibration Accuracy
After fixing and calibrating, test performance with these methods.
Accuracy Test
Power on and wait for 0.00g. Place a known weight such as a 100g calibration mass. Confirm reading is within plus or minus 0.02g for 0.01g scales, or plus or minus 0.2g for 0.1g scales.
Repeatability Test
Weigh the same object five times. Remove and reapply each time. All readings should match within tolerance.
Drift Test
Leave 100g on the scale for one minute. Reading should not change by more than plus or minus 0.02g. If any test fails, repeat calibration.
Prevent Future Scale Problems
Keep your scale accurate with smart habits.
Zero and Tare Properly
Always press TARE before adding a container. Pre-weigh and label containers, for example “Bowl = 42.35g”.
Store Safely
Keep in a dry, dust-free area. Use a dust cover or storage case. Remove batteries if storing long-term.
Schedule Maintenance
Perform daily wiping of the platform and zero before use. Clean weekly and test with a known weight. Calibrate monthly. Recalibrate immediately after moving the scale.
Final Checklist: Complete Scale Fix
Complete these steps in order.
• Diagnosed issue (resolution, accuracy, or power)
• Performed hard reset (five plus minute battery removal)
• Restored 0.01g mode (button combo on power)
• Placed on stable, level surface
• Used correct calibration weight (100g certified or 20 nickels)
• Completed full calibration (entered CAL mode, applied weight)
• Verified accuracy (tested with known weights)
• Cleaned and stored properly
Frequently Asked Questions About Fixing Gram Scales
Why does my scale only show 0.1g instead of 0.01g?
Your scale is likely in the wrong resolution mode. This happens after battery changes, accidental button presses, or power loss. Perform a hard reset, then hold MODE plus ON/OFF to cycle through resolution options until 0.01g appears.
How often should I calibrate my gram scale?
Calibrate after any battery change, after moving the scale, and every one to four weeks for regular use. Recalibrate immediately if readings seem off or drift significantly.
Can I use coins to calibrate my scale?
You can use coins in an emergency, but they are not accurate enough for precision work. A nickel weighs 5.0g, but circulated coins lose mass over time. For reliable calibration, use NIST-traceable certified weights.
Why does my scale show “Err” or “- “?
Error codes usually indicate an unstable surface, low batteries, or overload. Move to a hard, level surface. Replace batteries. Ensure nothing is on the scale when turning it on.
How do I know if my scale is accurate after calibration?
Test with a known weight. A properly calibrated 0.01g scale should read within plus or minus 0.02g of the actual weight. Repeat the test multiple times to confirm consistency.
Can a dropped scale be fixed?
Yes, in many cases. A drop may knock the scale into the wrong mode or cause calibration drift. Try a hard reset and recalibration first. If the load cell was damaged, the scale may need professional repair or replacement.
Key Takeaways for Fixing Your Gram Scale
Most scale problems are fixable with a reset and recalibration. You do not need technical skills. Start by diagnosing whether the issue is resolution, accuracy, or power failure. Restore 0.01g mode using the button combination for your model, then calibrate using a proper reference weight. Test accuracy with known weights and repeat calibration if needed. Keep this guide handy, and never toss a working scale again.