
Your digital pocket scale suddenly shows a negative sign, won’t calibrate, or gives erratic readings, and now your measurements are useless. You are not alone. Countless users face the same issue, only to discover their scale is not dead, it just needs a simple fix. Most problems stem from debris, loose parts, or calibration errors, not permanent damage. This guide reveals how to diagnose and repair your broken digital pocket scale step by step, using only basic tools and household items. Whether it is stuck on 0.1g, won’t turn on, or displays blinking error codes, you will learn exactly what to do.
We will walk through power checks, debris removal, strain gauge fixes, calibration tricks without professional weights, and how to restore precision. By the end, you will know when a fix is possible and when it is smarter to replace the unit.
Check Power and Battery First
Before disassembling your scale, rule out power issues. Many “dead” scales are simply starved of electricity.
Test and Replace the Battery
Start with the most common cause. Low or poorly seated batteries account for most startup failures. Most pocket scales use a CR2032 coin cell or AAA batteries. Remove the battery cover and inspect the following.
• Is the battery fully inserted?
• Are the terminals corroded or bent?
• Does the battery show signs of leakage?
Replace with a fresh battery of the correct type. Even if the old battery seems fine, weak voltage can prevent startup or cause flickering. After replacement, power on the scale with an empty platform.
Pro Tip: Swap the battery with one from a working device to confirm it is not the source of failure.
Clean Corroded Battery Contacts
Corrosion disrupts power flow. If you see white or green residue on metal contacts, follow these steps.
- Remove the battery.
- Dip a cotton swab in isopropyl alcohol (70% or higher).
- Gently scrub the terminals.
- Let dry completely before reinserting the battery.
Avoid using water or abrasive tools. Bent contacts can be carefully realigned with tweezers.
Verify External Power If Applicable
Some models support USB or AC power. If yours does, use a known-working adapter with matching voltage, typically 3V to 6V DC. Confirm polarity matches the label, such as center-negative. Test the cord on another device first. If the scale works with external power but not batteries, the issue is isolated to the battery compartment.
Warning: Never force a battery into place. Misalignment can damage internal circuits.
Remove Debris and Check for Binding

Dust, lint, or spilled liquids often cause binding. When the platform cannot move freely, the scale fails to register weight accurately.
Spot Signs of Mechanical Binding
Binding mimics electronic failure. Look for these indicators.
• Readings that drift up and down
• Failure to return to zero
• No response when pressing the platform
• A sticky feel under the pan
Even tiny particles can jam the load cell mechanism.
Clean Under the Weighing Platform
- Remove the pan: Use a fingernail or plastic tool to gently pry off the metal or plastic top.
- Inspect the gap: Shine a flashlight into the space between the platform and base. Look for hair or fibers, food crumbs, and dried liquid residue.
- Blow out debris: Use compressed air or a bulb syringe to dislodge particles.
Avoid canned air with propellants. Moisture can damage electronics.
Open the Housing for Deep Cleaning
If surface cleaning fails, follow these steps.
- Locate hidden screws: Check under rubber feet, labels, or the battery cover.
- Use a Phillips screwdriver to remove all screws. Keep them organized because some vary in length.
- Separate the case halves carefully. Do not force it because some models have snap-fit clips.
- Clean internal parts: Use a soft brush or cotton swab with isopropyl alcohol. Focus on the load cell area and strain gauge. Avoid touching circuitry unless necessary.
Caution: Never immerse the scale in water or use excessive liquid.
Reassemble and Test
Put everything back in reverse order. Ensure no wires are pinched, screws are snug but not over-tightened, and the platform moves freely when pressed. Power on and see if the display stabilizes. Binding fixes resolve over half of non-responsive scale cases.
Fix Calibration Failures
If your scale blinks 500, 100g, or CAL but won’t accept weight, it is stuck in calibration mode. This is usually caused by debris, loose screws, or power glitches.
Why Calibration Fails
Common causes include the following.
• Overloading the scale during use
• Interrupting calibration mid-process
• Loose strain gauge mounting screws
• Debris blocking the load path
• Inverted strain gauge orientation
Even a single loose screw can throw off calibration.
Run the Built-In Calibration Sequence
Most scales follow a three-press method.
- Press unit once → Display shows unit.
- Press unit again → Unit blinks and shows calibration weight, such as 200.
- Press unit a third time → Display blinks, ready for weight.
- Place correct calibration mass on the center of the platform.
- Wait 5 to 10 seconds for beep or PASS or END message.
- Power cycle to confirm calibration saved.
Note: Some models use MODE, CAL, or M instead of unit. Refer to your manual if available.
Calibrate Without a Certified Weight
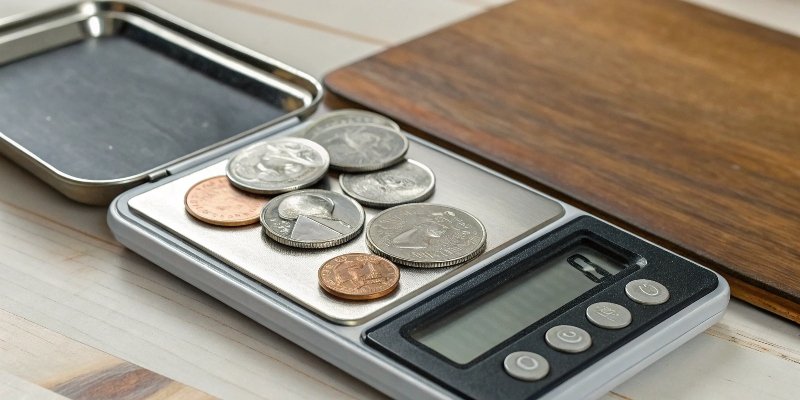
No calibration weight? Use U.S. nickels. Each weighs 5.000 grams post-1946.
Use Nickels as Precision Mass
• 200g requirement? Use 40 nickels.
• 500g requirement? Use 100 nickels.
Follow these steps.
- Wipe nickels clean because dirt adds error.
- Stack them neatly in the center.
- Use a small container if stacking becomes unstable.
- Do not move the scale during calibration.
Warning: Do not use pennies, dimes, or foreign coins because weights vary.
Alternative Household Weights
You can also use these common items.
• AAA battery: approximately 11.5g (test first on a known scale)
• U.S. quarter: approximately 5.67g
• Smartphone: Check specs for exact weight
Always use stable, clean objects. Movement or vibration ruins calibration.
Repair Inverted Strain Gauge
If your scale shows a negative sign or negative values under load, the strain gauge is likely upside down. This is a common fixable issue.
Locate the Sensor Bar
The strain gauge is a small silver metal strip connected to the load cell. It measures deformation when weight is applied.
- Remove the top and bottom screws (often hidden under labels or rubber pads).
- Open the case gently.
- Find the sensor bar beneath the platform, usually held by four screws.
Flip the Sensor Bar
An inverted gauge reads reverse deflection, causing negative output.
- Loosen the four mounting screws slightly. Do not remove them.
- Rotate the bar 180 degrees so the active side faces the correct direction.
- Re-tighten all screws securely.
- Reassemble the scale carefully.
Key Sign: If pressing the platform makes the display go more negative, flipping the bar will fix it.
Recalibrate After Adjustment
After flipping, power on and zero the scale. Perform full calibration with correct weight. Test with known objects. This fix has revived many dead scales that still powered on but showed negative signs or failed calibration.
Fix Stuck Resolution 0.1g Instead of 0.01g
If your scale used to display 0.01g but now only shows 0.1g, it may be stuck in coarse mode.
Reset the Firmware
- Remove the battery for at least 5 minutes.
- Press and hold the power button for 10 seconds to discharge residual power.
- Reinsert the battery and power on.
- Attempt calibration again.
This clears temporary memory and may restore fine resolution.
Try Resolution Switching Combos
Some models support manual switching. Press and hold unit plus on/off for 5 seconds. Repeatedly press mode until 0.01g appears.
Reality Check: Many budget scales do not support user-selectable resolution. If it previously showed 0.01g and now does not, it may indicate a hardware fault.
Confirm Model Capabilities
Check the original specs. If your scale was never rated for 0.01g, the display change might be a misinterpretation, not a failure.
Test Accuracy After Repair
Never assume a fix worked. Verify with real tests.
Zero the Scale Properly
- Place on a level, stable surface.
- Turn on with empty platform.
- Wait for 0.00 or 0.0.
- Press tare if it does not auto-zero.
Avoid carpeted or vibrating surfaces.
Weigh Known Objects
Use verified masses.
• 1 U.S. nickel: 5.00g
• 1 U.S. quarter: 5.67g
• 1 AAA battery: 11.0 to 12.5g
• 1 AA battery: 23.0 to 25.0g
Compare scale reading to expected value. Acceptable error is plus or minus 0.02g for 0.01g models.
Check Linearity and Repeatability
Test linearity by weighing 10g, 20g, 50g. Readings should scale proportionally. Test repeatability by weighing the same object 5 times. Results should match within tolerance. If readings drift or vary widely, repeat cleaning or check for loose parts.
Know When to Replace the Scale
Some failures cannot be fixed at home.
Irreparable Damage Signs
Watch for these conditions.
• Cracked load cell or broken strain gauge
• Burnt or corroded circuit board
• Missing internal components
• Persistent Err, OL, or — after all steps
• Physical cracks in housing or platform
These require professional repair, which is often more costly than replacement.
Cost-Effective Replacement
Most digital pocket scales cost $15 to $30. If you have spent over 30 minutes troubleshooting, the scale still fails accuracy tests, or it is out of warranty, replace it. New models are more reliable and come calibrated.
Pro Tip: Buy from brands with replaceable batteries and metal platforms for longer life.
Quick Repair Checklist
Use this flow to fix most issues fast.
| Step | Action | Expected Outcome |
|---|---|---|
| 1 | Replace battery | Scale powers on |
| 2 | Clean under pan | Binding eliminated |
| 3 | Open case, remove debris | Smooth platform movement |
| 4 | Tighten all screws | Stable calibration |
| 5 | Flip strain gauge if negative | Positive readings |
| 6 | Calibrate with nickels | Accurate baseline |
| 7 | Reset by removing battery | Clear firmware glitch |
| 8 | Test with known weights | Verified accuracy |
Frequently Asked Questions About Fixing a Broken Digital Pocket Scale
Why does my digital pocket scale show a negative sign?
A negative sign typically indicates the strain gauge is inverted or measuring reverse deflection. This happens when the sensor bar is installed upside down or becomes displaced. Fix this by opening the case, locating the sensor bar beneath the platform, and flipping it 180 degrees so the active side faces the correct direction.
How do I calibrate my pocket scale without official weights?
Use U.S. nickels as calibration mass. Each post-1946 nickel weighs exactly 5.000 grams. For a 200g calibration requirement, use 40 nickels. For 500g, use 100 nickels. Stack them cleanly in the center of the platform and follow the standard three-press calibration sequence.
What causes a pocket scale to get stuck on 0.1g resolution?
Stuck resolution usually stems from a firmware glitch or failed calibration attempt. Try removing the battery for at least 5 minutes, then press and hold the power button for 10 seconds to discharge residual power. Reinsert the battery and attempt calibration again. Many budget scales do not support user-selectable resolution, so check your model specifications first.
Why does my scale fail to register any weight?
This usually indicates binding, power issues, or a damaged load cell. First, replace the battery and clean under the weighing platform to remove debris. If the problem persists, open the housing and check for loose screws or visible damage to the load cell. Persistent failure after all troubleshooting suggests irreversible damage requiring replacement.
Can I fix a digital pocket scale that shows Err or OL?
Error codes usually mean overload, internal damage, or calibration failure. Try power cycling, cleaning debris from the load cell area, and performing a full calibration with correct weight. If the error persists after all steps, the load cell or circuit board is likely damaged and the scale should be replaced.
Final Thoughts on Fixing Your Digital Pocket Scale
Most broken digital pocket scales suffer from simple, fixable issues. Dead batteries, debris buildup, loose screws, or inverted sensors account for the majority of failures. With careful cleaning, proper calibration, and a few minutes of your time, you can restore precision without buying a new one. Always handle internal parts gently, and verify results with real tests using known weights like nickels or batteries.
If the scale remains faulty after working through these troubleshooting steps, replacement is the smart choice. Digital pocket scales are inexpensive, and spending more than 30 minutes on repairs rarely makes economic sense. Keep this guide handy for the next time your scale acts up, and you will know exactly what to do.



