
Counting scales are vital tools for inventory management, production lines, and quality control in industries like manufacturing, pharmaceuticals, logistics, and food processing. These precision instruments determine the number of identical parts by dividing total weight by an average piece weight, delivering speed and accuracy that manual counting cannot match. But when a counting scales repair is needed, operations can stall. Inaccurate counts, unstable readings, or complete system shutdowns can delay shipments, trigger compliance issues, and waste labor hours.
The good news is that most counting scale problems are repairable, often quickly and cost-effectively. Whether it is a simple power issue, mechanical binding, or a failed load cell, understanding common failures and how to fix them is key. This guide delivers a clear roadmap for diagnosing and repairing counting scales, identifying top service providers, and implementing preventive maintenance to avoid future downtime.
Diagnose Zero Weight Reading on Your Counting Scale
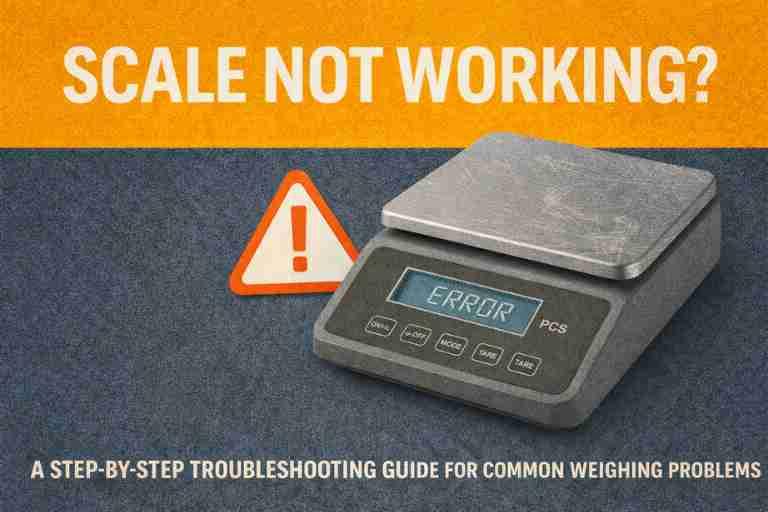
When your counting scale shows zero despite a load being present, start with basic checks before assuming internal failure.
Check Power and Connections
First, confirm the scale has power. Plug into a known-working outlet and inspect the power cord for fraying, kinks, or burn marks. For battery-powered models, test charge retention and replace if weak. Ensure the indicator is turned on and not in sleep mode.
Loose internal wiring is another frequent culprit. Open the base if trained and verify all connections at the junction box and indicator terminals. Reseat any disconnected or corroded wires.
Remove Shipping Hardware
Many users overlook shipping screws, metal bolts installed during transit to protect load cells. If not removed, they block platform movement and prevent weight registration. Locate screws under or near the base and remove completely using appropriate tools. Re-level the scale after removal.
Clean Under the Platform
Debris like dust, metal shavings, or spilled liquids can bind the weighing pan. Lift or remove the pan carefully and wipe clean with a damp cloth and mild detergent. Dry thoroughly before reassembling.
If these steps do not restore function, suspect load cell or indicator failure, both requiring professional testing with millivolt meters or simulator boxes.
Stabilize Fluctuating Readings
Erratic display values undermine counting accuracy and user confidence. Fix instability fast with targeted checks.
Eliminate Environmental Vibration
Vibrations from nearby machinery, foot traffic, or compressors disrupt sensitive measurements. Relocate the scale to a stable, isolated surface and use anti-vibration pads or marble slabs for dampening. Avoid placing on rolling carts unless designed for mobility.
Control Air Currents
Drafts from HVAC vents, fans, or open doors affect lightweight parts most. Install draft shields around benchtop models, close doors and redirect airflow, and allow time for thermal stabilization after environmental changes.
Test for EMI Interference
Electromagnetic interference from motors or unshielded cables introduces signal noise. Unplug nearby high-power devices temporarily and route data and power cables separately. Use shielded cables where possible.
If fluctuations persist, internal components may be failing, including damaged load cell wiring, corroded junction box, or failing analog-to-digital converter.
Fix Corner Load Errors

Inconsistent readings based on where items are placed indicate mechanical imbalance, common in multi-load-cell systems.
Perform Corner Load Test
Use a certified test weight, 50% of scale capacity recommended. Place weight in each quadrant, record reading in each position, and compare results. Deviation beyond one to two scale divisions signals a problem.
Inspect for Physical Damage
Impact or overloading can warp the housing or misalign the platform. Look for dents, bends, or stress cracks and check for binding during pan movement. Replace damaged parts immediately.
Diagnose Load Cell Failure
In scales with multiple load cells, one failing cell skews corner load distribution. Technicians measure mV/V output per cell, and a reading significantly lower than others indicates failure. Replace faulty cell and recalibrate.
Stop Drifting Readings
Gradual changes in displayed weight without load variation point to thermal, moisture, or electronic issues.
Allow Warm-Up Time
Electronic components need stabilization. Power on 15 to 30 minutes before critical use and avoid rapid temperature shifts like moving from cold storage to a warm room.
Prevent Moisture Ingress
Water in the indicator, cables, or load cells causes corrosion and drift. Shut down immediately if liquid spills, disconnect power, and dry all components. Use only IP65 or IP67-rated scales in washdown environments.
Replace Aging Components
Older electronics degrade over time. Capacitors lose capacitance causing power fluctuations, amplifier circuits drift due to component aging, and power supplies fail silently. Upgrade firmware or replace main board if under warranty.
Decode Error Codes Quickly
Modern counting scales display diagnostic codes to speed repairs.
Common Error Messages
| Code | Meaning | Action |
|---|---|---|
| OL | Overload | Remove load, check for binding |
| UL | Underload | Verify sample weight, test sensor |
| E1, E2 | Model-specific | Consult user manual |
| CAL | Calibration required | Perform calibration sequence |
| LoBat | Low battery | Charge or replace |
| Err10 | Load cell communication | Check wiring, test mV signal |
Access Diagnostic Mode
Most indicators allow access to raw sensor data. Enter service menu, view mV/V output from load cells, and compare readings to specification. A simulator box tests indicator independently, helping isolate load cell versus electronics fault.
Prevent Operator-Induced Errors
Even a perfectly repaired scale delivers bad counts if operators make mistakes.
Use Accurate Sample Weights
Garbage in, garbage out: inaccurate average piece weight ruins all counts. Count at least 25 to 100 pieces for sample and double-check entered count. Entering ten for nine pieces creates an 11% error.
Monitor Part Variance
No two manufactured parts are identical. A ±5% weight variance can cause ±50 error per 1,000 units. Scales with standard deviation alerts flag unacceptable variance. Link to SPC software to track trends and catch quality issues early.
Follow Standard Operating Procedures
Rushed operators skip calibration or ignore warnings. Implement SOPs, train staff on error recognition and response, and audit usage weekly to reinforce discipline.
Choose Top Counting Scales Repair Service Providers
When DIY fixes fail, turn to certified professionals with fast response and OEM parts access.
Alliance Scale Company
Alliance Scale serves New England and New York as an authorized OHAUS service center. They offer on-site diagnostics, calibration with NIST-traceable weights, and factory-trained technicians. Contact 781-828-8386 or service@alliancescale.com.
Precision Solutions
Now part of Applied Technical Services, Precision Solutions serves Pennsylvania, New Jersey, and the Mid-Atlantic. Their CWT-certified technicians hold ISO/IEC 17025 accreditation and specialize in pharmaceutical compliance. They offer 24/7 emergency service, in-house printer repair, and rental scales. Contact 484-859-0761.
Central Carolina Scale
Serving North Carolina and the Southeast, Central Carolina Scale maintains the largest local parts inventory in the region. Their fully stocked rolling shops enable same-day repairs. Contact 919-776-7737 or info@ccscale.com.
Data Weighing Systems
Located in Wood Dale, Illinois, Data Weighing Systems serves the Chicagoland area with ISO/IEC 17025-accredited technicians. They support Ohaus, Sartorius, A&D, and Minebea Intec brands. Contact 800-750-6842.
Test Load Cells Like a Pro
The load cell is the heart of any counting scale. Diagnose it correctly with these methods.
Measure mV/V Output
Apply known load and use a digital multimeter to read signal. Compare to specification, typically 2.0 mV/V ± 0.02. Low or zero signal indicates failed cell or wiring issue.
Check Resistance Values
Input resistance should match specification, typically 1000 Ω ± 5 Ω. Output resistance is typically 1000 Ω ± 3 Ω. Deviations suggest internal damage.
Test Insulation Resistance
Apply 50V DC between cable shield and body. Must read greater than 5,000 MΩ. Low values indicate moisture or short circuit. A megohmmeter is required for this test.
Follow Preventive Maintenance Plan
Regular care prevents 80% of counting scale failures.
Daily Tasks
Clean pan with mild soap and water, remove debris under platform, and zero the scale at start of shift.
Weekly Checks
Inspect cables for kinks or cuts, test accuracy with known weight, and confirm stable power.
Monthly Actions
Run corner load test, verify counting with known sample, and backup configuration settings.
Annual Services
Schedule professional calibration, replace worn feet, seals, or cables, and review service log for recurring issues.
Optimize Environmental Conditions
Even the best repair will not last in poor conditions.
Control Temperature and Humidity
Operate between 10°C and 40°C, use dehumidifiers in high-moisture areas, and avoid rapid thermal shifts.
Choose Right IP Rating
IP65 is dust-tight and resists water jets, ideal for food plants. IP67 survives temporary immersion, best for washdown zones. Replace older models with IP65+ units in harsh environments.
Manage Downtime with Rentals
Every hour offline costs money. Prepare ahead with rental options.
Rent During Repairs
Providers like Precision Solutions, Data Weighing Systems, and Central Carolina Scale offer rental scales. Maintain production while your unit is serviced.
Evaluate Repair Versus Replacement
Use this rule: if repair cost exceeds 60% of new scale price, consider replacement. Power supply repairs cost $75 to $150 versus $300+ for new. Load cell replacement costs $200 to $400 versus $500 to $2,000 for new.
Frequently Asked Questions About Counting Scales Repair
Why does my counting scale show zero weight even with items on the platform?
This usually indicates power issues, shipping screws not removed, mechanical binding, or load cell failure. Start by checking power connections, removing transit screws, and cleaning under the platform. If unresolved, the load cell or indicator may need professional diagnosis.
How do I fix unstable readings on my counting scale?
Address environmental factors first. Move the scale away from vibrating machinery, control air currents with draft shields, and ensure placement on a rigid surface. If instability persists, test for EMI interference or have internal components checked by a technician.
What causes corner load errors on counting scales?
Corner load errors occur when weight readings vary depending on item placement. This indicates uneven support contact, over-tightened leveling feet, mechanical obstruction, or a failing load cell in multi-cell systems. Perform a corner load test with a certified weight to diagnose.
How often should I schedule professional calibration for counting scales?
Schedule professional calibration annually at minimum. High-use scales in manufacturing or pharmaceutical settings may require quarterly or monthly calibration. Always maintain documentation for FDA, ISO, and NTEP audits.
Can I repair a counting scale myself, or do I need a professional?
Simple issues like cleaning, power checks, and shipping screw removal are DIY-friendly. However, load cell testing, junction box repairs, and indicator diagnostics require certified technicians with proper tools. Always hire professionals for warranty-covered repairs.
What is the average cost for counting scales repair?
Power supply repairs typically cost $75 to $150. Load cell replacement runs $200 to $400. Main board failures cost $250 to $500. Compare repair costs to replacement threshold of 60% of new scale price to guide your decision.
Key Takeaways for Counting Scales Repair Success
Counting scales are precision assets, not disposable tools. With proper care, most issues are fixable and downtime is avoidable. Start troubleshooting with basic checks like power verification, shipping hardware removal, and platform cleaning before calling professionals.
When professional repair is needed, choose certified providers with OEM parts access, NIST-traceable calibration, and documented service records. Providers like Alliance Scale, Precision Solutions, and Central Carolina Scale offer the expertise required for accurate, compliant repairs.
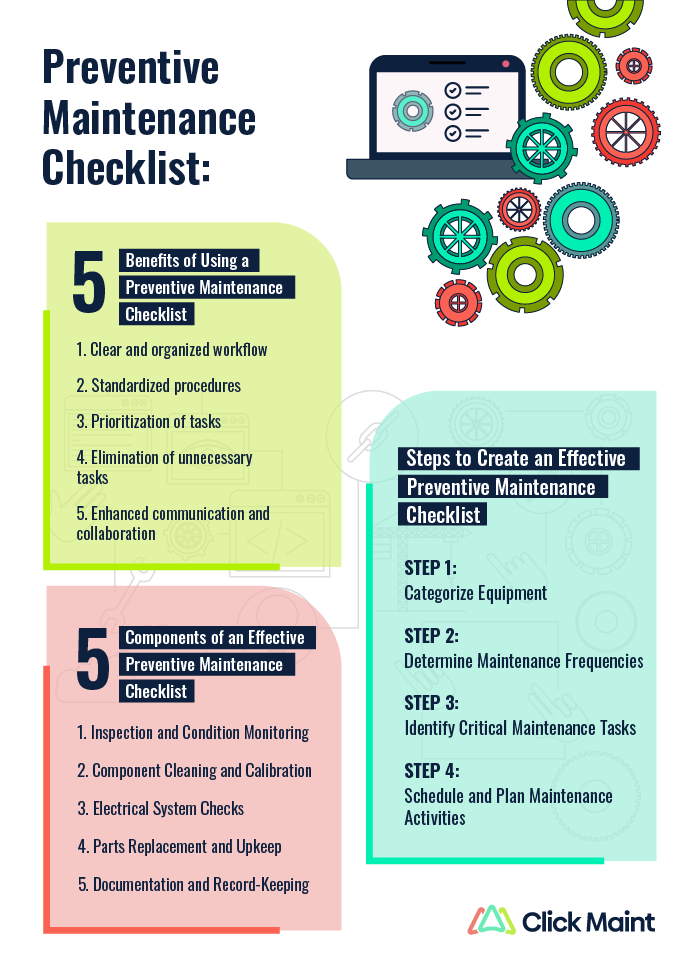
Implement preventive maintenance daily, weekly, monthly, and annually to catch issues early. Train operators on proper use and error recognition, and maintain rental agreements or backup scales for critical operations. By pairing operator training with professional support, you ensure accuracy, compliance, and continuous operation no matter the industry.



