You’re ready to bake your favorite recipe, but the kitchen scale greets you in ounces. You need grams fast. Changing your digital kitchen scale to grams is simple, but if you’ve never done it, it can be confusing. Most modern digital kitchen scales support grams as a default unit, yet many ship set to ounces, especially in North America. The good news? Switching is quick and consistent across nearly all models, from budget brands to premium OXO or Mainstays versions. Whether you’re measuring 125 g of flour or taring a mixing bowl, this guide walks you through every step to confidently use grams for precise, repeatable results.
Find the Unit Button on Your Scale
The fastest way to switch your scale to grams is using the unit button. This control lets you toggle between measurement systems like grams, ounces, pounds, and sometimes milliliters. The unit button is typically located near the center or side of the control panel.
Identifying the Correct Button
Look for a button labeled Unit, Mode, or symbols like g/oz. On some models, the unit function is combined with the power or mode button. Press briefly to cycle units, hold longer to turn the device on or off. High-end scales may feature a dedicated, clearly marked Unit button or even a rotating dial for easier access. If your scale has touch-sensitive controls, ensure your fingers are dry to avoid missed inputs.
Common button locations by brand include OXO Good Grips with a side-mounted Unit button, Mainstays with a center Mode button, and Etekcity or Escali with a Unit or g/oz symbol. If you don’t see a clear label, consult your user manual or simply test each button when the scale is on.
Switch Your Scale to Gram Mode

Once you’ve found the unit button, follow these steps to switch to grams. Turn on the scale by pressing the power button. The display usually shows 0.0 oz, 0 g, or the last-used unit. Press the unit button once. Each press cycles forward: oz to g to lb to kg to sometimes ml or fl oz and back to oz. Wait for g to appear on the screen. It may take 2 to 4 presses depending on the starting unit. Stop pressing when g is displayed. Your scale is now set to measure in grams.
Some models show grams spelled out; others use just g. Either means the same thing. Not all scales remember your unit choice. Budget models may reset to ounces every time they power off. In that case, you’ll need to repeat this step before each use.
Verify Grams Are Active Before Measuring
Before adding ingredients, verify the scale is truly in gram mode. Watch for visual cues like the unit symbol g appearing in the corner or below the number. The display should read 0 g after taring with no oz, lb, or kg indicator visible. If you place a small object on the scale and it shows 21 oz, you’re still in ounces, not grams. Repeat the unit cycling process.
Use a quick test with a known item to confirm accuracy. An AA battery weighs approximately 23 g, a U.S. quarter weighs approximately 5.7 g, and a standard spoon weighs approximately 30 to 50 g. If the reading matches closely within 1 g, your scale is accurate and correctly set to grams.
Use the Tare Function for Accurate Measurements
After switching to grams, the tare function becomes essential for accurate ingredient measurement. Place an empty bowl or cup on the scale platform. Press the tare button labeled Tare, Zero, or 0. The display resets to 0 g, canceling the container’s weight. Add your ingredient directly into the container. The number shown is now only the ingredient’s weight in grams.
For example, if a recipe calls for 150 g of flour, keep adding until the display reads exactly 150.0 g. After measuring one ingredient, press tare again to reset to 0 g and add the next ingredient. This allows you to weigh multiple items in the same bowl, reducing cleanup and preventing miscalculations. Measure sticky items like honey or peanut butter in a separate small bowl that’s easy to scrape clean.
Know What Units Your Scale Supports
Your scale likely supports several units beyond grams. Knowing what they mean helps avoid mistakes. Standard units on digital scales include grams for precision baking and global recipes, ounces for common U.S. recipes, pounds for large quantities like meat or dough, kilograms for very heavy loads like water or large batches, milliliters for volume estimate (only accurate for water), and fluid ounces for liquid volume (not weight-based).
Important note: ml and fl oz are volume units, not weight. They assume a density like water, so they’re inaccurate for flour, sugar, or oil. Always use grams for dry ingredients.
Why Grams Provide Better Results Than Cups

Switching to grams isn’t just about metric preference. It’s about accuracy, consistency, and control. Most digital scales measure in 0.1 g to 1 g increments. That level of detail is critical when making macarons where too much almond flour creates cracked shells, baking sourdough where 10 g extra water changes hydration, or portioning yeast or baking powder. A 15 to 25 g difference in flour can turn cookies from chewy to flat. Using grams eliminates guesswork from scooping versus spooning, settled versus aerated flour, and inconsistent cup sizes.
Cup measurements vary worldwide. One U.S. cup of flour equals approximately 120 g, while one Australian cup of flour equals approximately 150 g. But 150 g of flour is always 150 g, no matter where you are. If a French recipe calls for 200 g of butter, you’ll get it right every time. Professional bakers use grams exclusively, as do serious home bakers who want repeatable results.
Best Practices for Gram-Based Weighing
Maximize accuracy and efficiency with these proven techniques. Weigh directly in your mixing bowl by putting your main mixing bowl on the scale, pressing tare to zero it out, adding the first ingredient, and pressing tare again before adding the next. This method uses fewer dishes, prevents contamination, and keeps measurements accurate.
Choose physical buttons over touch controls. Scales with physical buttons outperform touch-sensitive ones because they work with wet, floured, or greasy hands, provide tactile feedback, and reduce accidental presses. Place your scale on a stable surface. Use a flat, level countertop, avoid heat sources like stoves or ovens, and stay away from fans or drafts. An unstable surface causes drifting numbers or false Err messages.
Handle small amounts carefully. For spices, salt, or yeast, use a small dish or parchment paper, tare first, and add slowly with a spoon. Dense ingredients like brown sugar or butter pack down easily, so add gradually to avoid overshooting.
Advanced Features That Enhance Gram Use
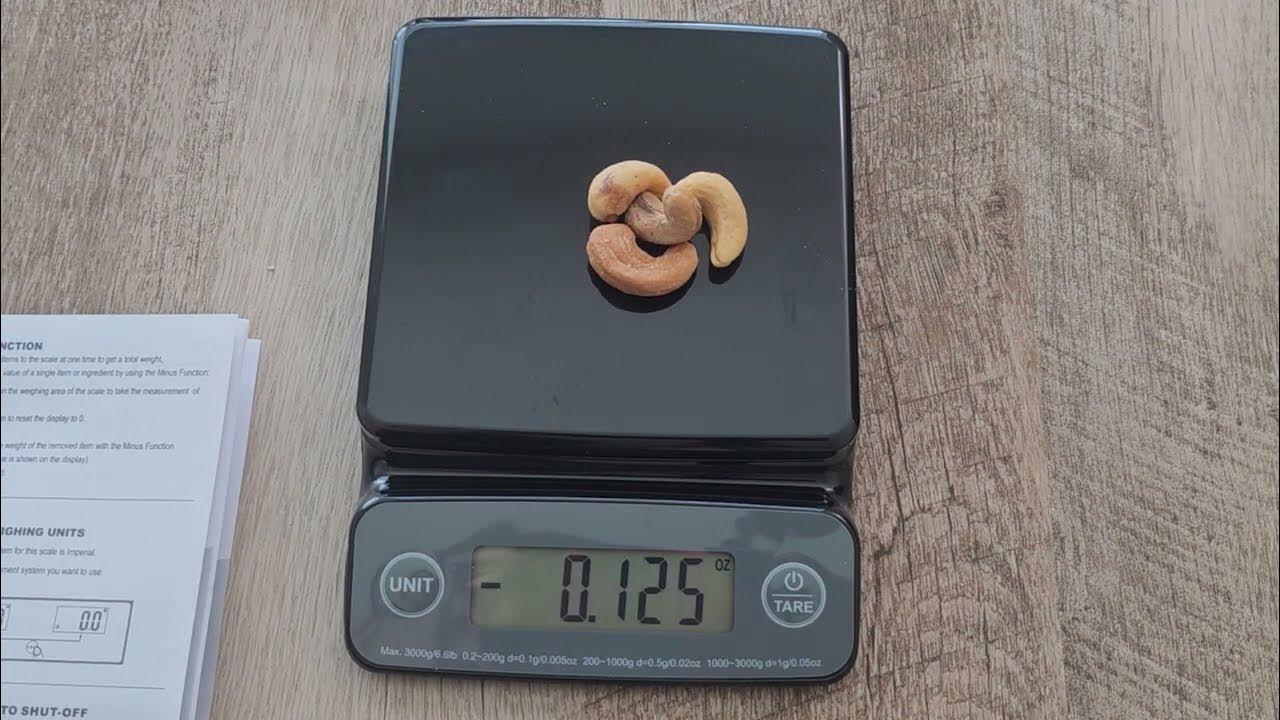
Higher-end scales offer tools that enhance gram-based cooking. Some models like Mainstays include a minus function. Weigh food on the scale, press tare to reset to 0 g, then remove a portion. The scale shows how much was taken. This is perfect for portion control, adjusting ingredient amounts mid-recipe, and tracking leftovers.
Pick a high-capacity scale for stand mixer bowls or large batches. Choose a scale with 5 kg or 11 lb capacity or higher. Avoid low-capacity models around 3 kg that show Err under load. Ensure the scale can handle both your heaviest container and total ingredient weight.
Watch for battery and error signals. Common display codes include Lo for low battery (replace with two AAA batteries), Err for overload (remove item and restart), and auto-off after 2 to 3 minutes of inactivity. To manually turn off some models like Mainstays, hold the power button for 3 seconds.
What to Look for When Buying a Gram-Ready Scale
Invest in a model that makes gram use seamless. Must-have features include physical buttons for reliability with messy hands, grams easily accessible so you don’t need to cycle through 5 units, full-range tare to zero at any weight, backlit display for readability in dim light, angled or pull-out screen to see display under tall bowls, capacity of 5 kg or higher to fit heavy mixer bowls, precision of 0.1 to 1 g for accurate spices and flour, and non-slip base to prevent sliding during use.
Avoid unnecessary features like Bluetooth or app connectivity, auto-recipe suggestions, and multiple language displays. These rarely improve performance and often reduce reliability.
Fix Common Gram-Switching Problems
Even simple processes can go wrong. Here’s how to fix them. If your scale won’t switch to grams, the cause is often not pressing the unit button enough times. Some models require 4 to 5 presses to reach grams. Keep pressing until g appears.
If the display shows Err in gram mode, the weight exceeds maximum capacity, such as a heavy bowl plus ingredients. Remove everything, restart the scale, and use a lighter container.
If reading fluctuates after taring, drafts, moisture, or unstable surface are likely causes. Move to a solid countertop, wipe the platform dry, and turn off nearby fans.
If the scale resets to ounces after turning off, your model doesn’t save unit settings. Manually switch to grams each time or upgrade to a model that retains settings like OXO.
If the tare button doesn’t work in grams, low battery, stuck button, or internal error may be the cause. Replace batteries, power off and restart, and clean around the button with a dry cloth.
Real-World Tips From Home Bakers
Home bakers who switched to grams report fewer failed recipes, especially with cookies and breads, better texture control in cakes and pastries, less cleanup with no measuring cups, and faster prep time when using the tare-and-add method. Many regret using touch-sensitive scales after flour-covered fingers failed to register taps.
Long-term users recommend mid-priced models around $15 to $25 with physical buttons. The OXO Good Grips Stainless Steel Food Scale is frequently cited as the most durable and user-friendly. One user noted that switching to grams cut baking failures in half and finally got sourdough to rise consistently.
Final Recommendations by Experience Level
For beginners, start with an affordable, reliable model around $12 to $15. Ensure it has physical buttons, tare, and unit toggle. Always set to grams before use and practice taring with everyday bowls.
For serious bakers, invest in a 5 kg capacity scale with backlit, angled display. Standardize ingredient weights like 125 g per cup of flour across all recipes. Use tare before every ingredient for precision.
For international cooking, use gram-only recipes to avoid regional cup differences. Avoid recipes without weights and use trusted conversion charts rather than random online converters.
Standard conversions to memorize include 1 cup all-purpose flour equals 125 g, 1 cup granulated sugar equals 200 g, 1 cup brown sugar equals 220 g, and 1 cup butter equals 227 g.
Frequently Asked Questions About Switching Kitchen Scales to Grams
How do I change my kitchen scale from ounces to grams?
Locate the unit button on your scale, turn on the device, and press the unit button repeatedly until the display shows g or grams. Most scales require 2 to 4 presses to cycle through all available units and reach grams.
Why does my scale keep switching back to ounces?
Many budget models do not save your unit preference when powered off. These scales reset to the default unit, usually ounces, every time you turn them on. Manually select grams before each use or consider upgrading to a model that retains settings.
What does the tare button do on a kitchen scale?
The tare button zero outs the weight of any container placed on the scale. After pressing tare, the display shows 0 g even though the container remains on the platform. This allows you to weigh ingredients directly in bowls without accounting for the container’s weight.
Can I weigh liquids in grams on my kitchen scale?
Yes, you can weigh liquids in grams. One milliliter of water equals exactly one gram, so gram measurements work well for water-based liquids. However, liquids with different densities will weigh more or less than their volume suggests. For accuracy, weigh liquids by weight rather than volume.
Why does my scale show Err when using grams?
The Err message indicates the weight exceeds the maximum capacity. Remove some items from the scale, restart the device, and try again with a lighter container or smaller portions.
Key Takeaways for Using Grams on Your Kitchen Scale
Mastering how to change your kitchen scale to grams transforms cooking from guessing to precision. With one button press and a quick tare, you unlock consistent, professional-quality results every time. Whether you’re baking delicate pastries or scaling up a family recipe, grams give you control, accuracy, and confidence.
The unit button is your gateway to gram mode. Find it, press it until g appears, and verify the display shows grams before measuring. Use the tare function to zero out containers and weigh multiple ingredients in one bowl. This method reduces cleanup and ensures accuracy throughout your recipe.
Start small, choose the right scale with physical buttons and gram accessibility, and make grams your default measurement. Your kitchen and your recipes will thank you with better results and fewer failed bakes.